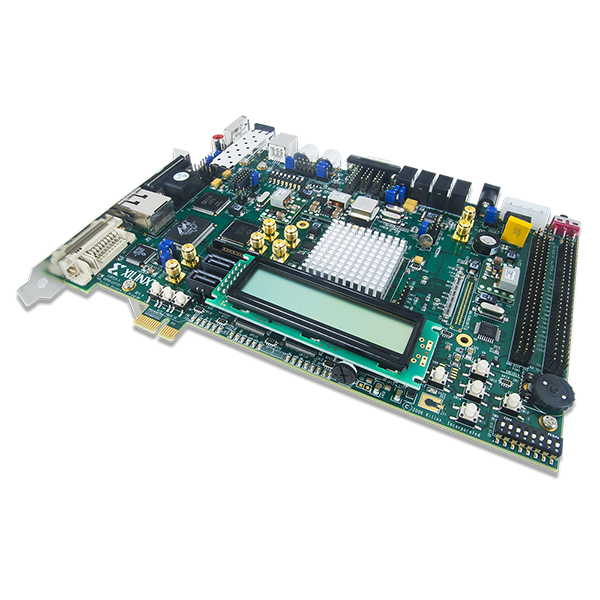
.前一段时间在玩xilinx送我在跑XUPV5-LX110T,首先跑xilinx给出的XUPV5-LX110T的demo设计,结果发现遇到了一些错误但是自己在网上发现很少有答案,就把自己的一些总结贴出来:
(1)xupv5_bsb_std_ip时出现了问题,其错误描述如下:
[xupv5_bsb_system.ucf(1110)]: NET "xps_iic_0_Gpo_pin" not found. Please
verify that:
1. The specified design element actually exists in the original design.
2. The specified object is spelled correctly in the constraint source file.
IOSTANDARD=LVCMOS33;> [xupv5_bsb_system.ucf(1111)]: NET "xps_iic_0_Gpo_pin"
not found. Please verify that:
1. The specified design element actually exists in the original design.
2. The specified object is spelled correctly in the constraint source file.
make: *** [__xps/xupv5_bsb_system_routed] Error 1
解决办法:打开xupv5_bsb_std_ip文件夹里面的xupv5_bsb_system.mhs文件,
在其80行的位置,将PORT xps_iic_0_Gpo_pin = xps_iic_0_Gpo, DIR = O, VEC = [31:31]注释掉(即在前面加上#即可)或删除。
在其551行的位置,将 PORT Gpo = xps_iic_0_Gpo注释掉(即在前面加上#即可)或删除。
保存该文件。
然后打开xupv5_bsb_std_ip文件夹里面的xupv5_bsb_system.ucf文件
在其1110行和1111行的位置,将Net xps_iic_0_Gpo_pin LOC=AK6; # DVI_RESET_B
Net xps_iic_0_Gpo_pin IOSTANDARD=LVCMOS33;两行删除或者注释掉。
保存该文件即可。
(2).Running DRCs for OSes, Drivers and Libraries ...
Runnning DRC for lwIP library...
ERROR:MDT - issued from TCL procedure "::sw_lwip_v3_00_a::lwip_drc" line 12
lwip () - No Ethernet MAC cores are addressable from processor ppc440_0.
lwIP requires atleast one EMAC (xps_ethernetlite | xps_ll_temac) core.
ERROR:MDT - Error while running DRC for processor ppc440_0...
make: *** [ppc440_0/lib/libxil.a] Error 2
Done!
看到了这个问题,首先要学会自己找,上面明显提示是lwip出错,我们看一下datasheet就会发现: lwIP provides an easy way to add TCP/IP-based networking capability to an embedded systemlwip_v3_00_a in EDK provides adapters for the xps_ethernetlite and xps_ll_temac
Xilinx? Ethernet MAC cores, and is based on the lwIP stack version 1.2.0. This document
describes how to use lwip_v3_00_a to add networking capability to embedded software. 我们知道了它的作用,那就找吧,反正,xilinx里面是以mhs和mss文件为主线,那就行动吧
解决办法:在mss文件里找到# BEGIN LIBRARY
PARAMETER LIBRARY_NAME = lwip
PARAMETER LIBRARY_VER = 3.00.a
PARAMETER PROC_INSTANCE = microblaze_0
PARAMETER api_mode = SOCKET_API
END
将其注释掉或者删除。
(3).ERROR: Failed to add write permission for
D:\..\microblaze_0\libsrc\lcd_ip_v1_00_a\
ERROR:Failed to copy
D:\..\drivers\lcd_ip_v1_00_a\src\ to
D:\..\microblaze_0\libsrc\lcd_ip_v1_00_a\
Copying files for driver cpu_v1_11_b from
D:\Xilinx\11.1\EDK\sw\XilinxProcessorIPLib\drivers\cpu_v1_11_b\src\ to
ERROR: Error while running "Copy Files" for processor microblaze_0...
make: *** [microblaze_0/lib/libxil.a] Error 2
Done!
解决办法:到桌面右键单击我的电脑,选择属性,再选择高级这一栏,单击环境变量,在新弹出的环境变量对话框下,单击系统变量的新建按钮,输入变量名:CYGWIN
在变量值中输入:nontsec,单击OK,重新启动XPS,重新编译即可。
(4).ERROR:EDK - D:\Xilinx\sample\xupv5_bsb_std_ip\xupv5_bsb_system.mhs line 392 - PARAMETER C_LEFT_POS has value 7 which does not fall in the range (0:C_SPLIT-1), specified in MPD
ERROR:EDK - D:\Xilinx\sample\xupv5_bsb_std_ip\xupv5_bsb_system.mhs line 393 - PARAMETER C_SPLIT has value 31 which does not fall in the range (1:C_SIZE_IN-1), specified in MPD
ERROR:EDK - D:\Xilinx\sample\xupv5_bsb_std_ip\xupv5_bsb_system.mhs line 392 - PARAMETER C_LEFT_POS has value 7 which does not fall in the range (0:C_SPLIT-1), specified in MPD
ERROR:EDK - D:\Xilinx\sample\xupv5_bsb_std_ip\xupv5_bsb_system.mhs line 393 - PARAMETER C_SPLIT has value 31 which does not fall in the range (1:C_SIZE_IN-1), specified in MPD
解决办法:This error can be safely ignored as it is being generated incorrectly. The project will implement.
官方给出的答复是忽略这个错误。
(5).WARNING:EDK:2099 - PORT:I_ADDRTAG CONNECTOR:ilmb_M_ADDRTAG -
D:\Xilinx\11.1\EDK\hw\XilinxProcessorIPLib\pcores\microblaze_v7_20_a\data\mic
roblaze_v2_1_0.mpd line 232 - floating connection!
WARNING:EDK:2099 - PORT:D_ADDRTAG CONNECTOR:dlmb_M_ADDRTAG -
D:\Xilinx\11.1\EDK\hw\XilinxProcessorIPLib\pcores\microblaze_v7_20_a\data\mic
roblaze_v2_1_0.mpd line 273 - floating connection!
WARNING:EDK:2099 - PORT:HostMiimSel CONNECTOR:host_mii_sel -
D:\Xilinx\11.1\EDK\hw\XilinxProcessorIPLib\pcores\xps_ll_temac_v2_00_a\data\x
ps_ll_temac_v2_1_0.mpd line 264 - floating connection!
WARNING:EDK:2099 - PORT:HostReq CONNECTOR:host_req -
D:\Xilinx\11.1\EDK\hw\XilinxProcessorIPLib\pcores\xps_ll_temac_v2_00_a\data\x
ps_ll_temac_v2_1_0.mpd line 265 - floating connection!
WARNING:EDK:2099 - PORT:HostAddr CONNECTOR:host_addr -
D:\Xilinx\11.1\EDK\hw\XilinxProcessorIPLib\pcores\xps_ll_temac_v2_00_a\data\x
ps_ll_temac_v2_1_0.mpd line 266 - floating connection!
WARNING:EDK:2099 - PORT:HostEmac1Sel CONNECTOR:host_emac1_sel -
D:\Xilinx\11.1\EDK\hw\XilinxProcessorIPLib\pcores\xps_ll_temac_v2_00_a\data\x
ps_ll_temac_v2_1_0.mpd line 267 - floating connection!
WARNING:EDK:2099 - PORT:bscan_tdi CONNECTOR:bscan_tdi -
D:\Xilinx\11.1\EDK\hw\XilinxProcessorIPLib\pcores\mdm_v1_00_e\data\mdm_v2_1_0
.mpd line 223 - floating connection!
WARNING:EDK:2099 - PORT:bscan_reset CONNECTOR:bscan_reset -
D:\Xilinx\11.1\EDK\hw\XilinxProcessorIPLib\pcores\mdm_v1_00_e\data\mdm_v2_1_0
.mpd line 224 - floating connection!
WARNING:EDK:2099 - PORT:bscan_shift CONNECTOR:bscan_shift -
D:\Xilinx\11.1\EDK\hw\XilinxProcessorIPLib\pcores\mdm_v1_00_e\data\mdm_v2_1_0
.mpd line 225 - floating connection!
WARNING:EDK:2099 - PORT:bscan_update CONNECTOR:bscan_update -
D:\Xilinx\11.1\EDK\hw\XilinxProcessorIPLib\pcores\mdm_v1_00_e\data\mdm_v2_1_0
.mpd line 226 - floating connection!
WARNING:EDK:2099 - PORT:bscan_capture CONNECTOR:bscan_capture -
D:\Xilinx\11.1\EDK\hw\XilinxProcessorIPLib\pcores\mdm_v1_00_e\data\mdm_v2_1_0
.mpd line 227 - floating connection!
WARNING:EDK:2099 - PORT:bscan_sel1 CONNECTOR:bscan_sel1 -
D:\Xilinx\11.1\EDK\hw\XilinxProcessorIPLib\pcores\mdm_v1_00_e\data\mdm_v2_1_0
.mpd line 228 - floating connection!
WARNING:EDK:2099 - PORT:bscan_drck1 CONNECTOR:bscan_drck1 -
D:\Xilinx\11.1\EDK\hw\XilinxProcessorIPLib\pcores\mdm_v1_00_e\data\mdm_v2_1_0
.mpd line 229 - floating connection!
解决方案:官方给出的解决方案是忽略warning,对结果不影响。
(6).ERROR: 1 constraint not met.
PAR could not meet all timing constraints. A bitstream will not be generated.
To disable the PAR timing check:
1> Disable the "Treat timing closure failure as error" option from the Project Options dialog in XPS.
OR
2> Type following at the XPS prompt:
XPS% xset enable_par_timing_error 0
解决办法:在XPS的project菜单栏选择project options中选择hierarchy and Flow将Treating
timing closure failure as an error前面的√去掉即可。
(7).ERROR:Place:713 - IOB component "fpga_0_DDR2_SDRAM_DDR2_DQ<13>" and
IODELAY
component
"DDR2_SDRAM/DDR2_SDRAM/mpmc_core_0/gen_v5_ddr2_phy.mpmc_phy_if_0/u_phy_io_0/g
en_dq[13].u_iob_dq/u_idelay_dq" must be placed adjacent to each other
into
the same I/O tile in order to route net
"DDR2_SDRAM/DDR2_SDRAM/mpmc_core_0/gen_v5_ddr2_phy.mpmc_phy_if_0/u_phy_io_0/g
en_dq[13].u_iob_dq/dq_in". The following issue has been detected:
Some of the logic associated with this structure is locked. This should
cause
the rest of the logic to be locked.A problem was found at site
IODELAY_X0Y56
where we must place IODELAY
DDR2_SDRAM/DDR2_SDRAM/mpmc_core_0/gen_v5_ddr2_phy.mpmc_phy_if_0/u_phy_io_0/ge
n_dq[13].u_iob_dq/u_idelay_dq in order to satisfy the relative
placement
requirements of this logic. IODELAY
DDR2_SDRAM/DDR2_SDRAM/mpmc_core_0/gen_v5_ddr2_phy.mpmc_phy_if_0/u_phy_io_0/ge
n_dqs[0].u_iob_dqs/u_iodelay_dq_ce appears to already be placed there
which
makes this design unplaceable.
解决办法:打开你的工程,在system assembly view的界面下,切换到ports栏下,将fpga_0_DDR2_SDRAM的下拉框中,找到相应的的项,选中相应的项就可以。

 电子发烧友App


评论