适配 ST7789v LCD
R128 平台提供了 SPI DBI 的 SPI TFT 接口,具有如下特点:
- Supports DBI Type C 3 Line/4 Line Interface Mode
- Supports 2 Data Lane Interface Mode
- Supports data source from CPU or DMA
- Supports RGB111/444/565/666/888 video format
- Maximum resolution of RGB666 240 x 320@30Hz with single data lane
- Maximum resolution of RGB888 240 x 320@60Hz or 320 x 480@30Hz with dual data lane
- Supports tearing effect
- Supports software flexible control video frame rate
同时,提供了 SPILCD 驱动框架以供 SPI 屏幕使用。
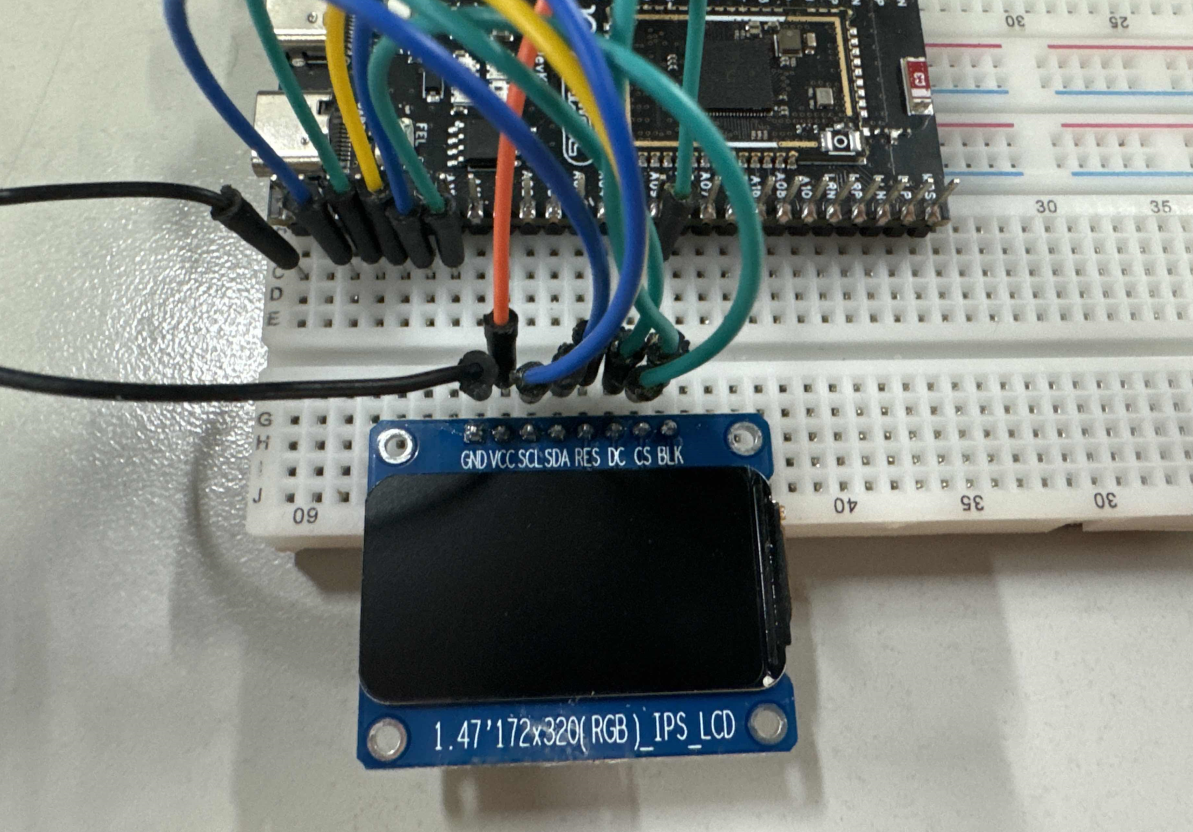
此次适配的SPI屏为 ZJY240S0800TG11,使用的是 SPI 进行驱动。注意请购买带 CS 引脚的 SPI 屏幕,由于 ST7789v SPI 时序问题,CS 引脚直接接地可能会导致初始化无法写入。如果很不幸SPI TFT是不带 CS 的,请飞线出来连接 CS 引脚(如图所示)
R128 Devkit
TFT 模块
PA12
CS(飞线)
PA13
CLK
PA18
MOSI
PA9
BLK
PA20
RES
PA19
3V3
VCC
GND
GND
悬空
MISO
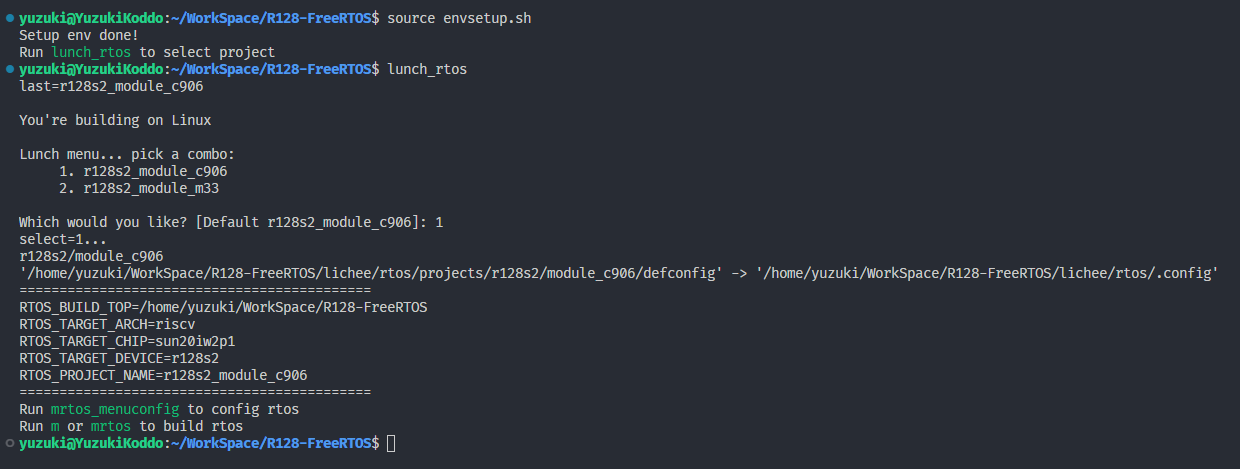
载入方案
我们使用的开发板是 R128-Devkit,需要开发 C906 核心的应用程序,所以载入方案选择 r128s2_module_c906
$ source envsetup.sh
$ lunch_rtos 1
设置 SPI 驱动
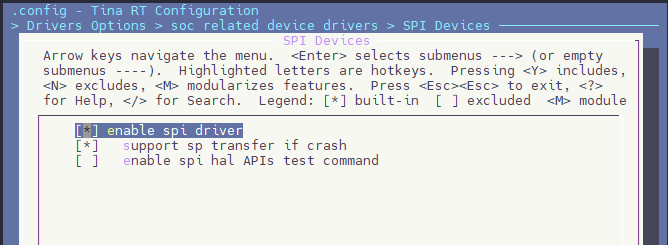
屏幕使用的是SPI驱动,所以需要勾选SPI驱动,运行 mrtos_menuconfig 进入配置页面。前往下列地址找到 SPI Devices
Drivers Options  --- >
    soc related device drivers  --- >
        SPI Devices --- >
        -*- enable spi driver
配置 SPI 引脚
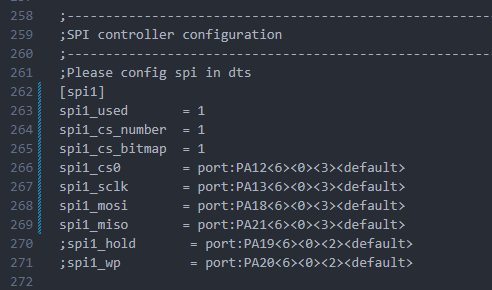
打开你喜欢的编辑器,修改文件:board/r128s2/module/configs/sys_config.fex,在这里我们不需要用到 SPI HOLD与SPI WP引脚,注释掉即可。
;----------------------------------------------------------------------------------
;SPI controller configuration
;----------------------------------------------------------------------------------
;Please config spi in dts
[spi1]
spi1_used       = 1
spi1_cs_number  = 1
spi1_cs_bitmap  = 1
spi1_cs0        = port:PA12< 6 >< 0 >< 3 >< default >
spi1_sclk       = port:PA13< 6 >< 0 >< 3 >< default >
spi1_mosi       = port:PA18< 6 >< 0 >< 3 >< default >
spi1_miso       = port:PA21< 6 >< 0 >< 3 >< default >
;spi1_hold       = port:PA19< 6 >< 0 >< 2 >< default >
;spi1_wp         = port:PA20< 6 >< 0 >< 2 >< default >
设置 PWM 驱动
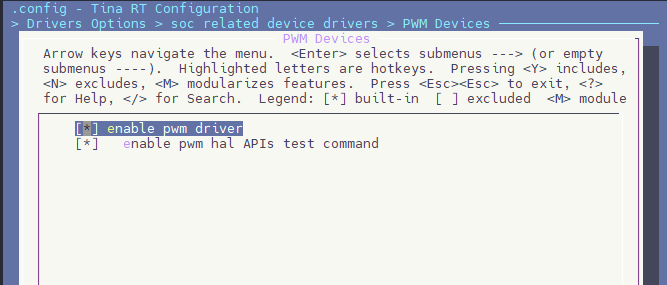
屏幕背光使用的是PWM驱动,所以需要勾选PWM驱动,运行 mrtos_menuconfig 进入配置页面。前往下列地址找到 PWM Devices
Drivers Options  --- >
    soc related device drivers  --- >
        PWM Devices --- >
        -*- enable pwm driver
配置 PWM 引脚
打开你喜欢的编辑器,修改文件:board/r128s2/module/configs/sys_config.fex,增加 PWM1 节点
[pwm1]
pwm_used        = 1
pwm_positive    = port:PA9< 4 >< 0 >< 3 >< default >
设置 SPI LCD 驱动
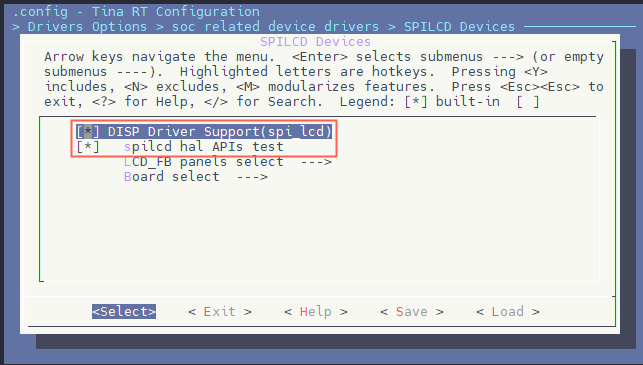
SPI LCD 由专门的驱动管理。运行 mrtos_menuconfig 进入配置页面。前往下列地址找到 SPILCD Devices ,注意同时勾选 spilcd hal APIs test 方便测试使用。
Drivers Options  --- >
    soc related device drivers  --- >
        [*] DISP Driver Support(spi_lcd)
        [*]   spilcd hal APIs test
编写 SPI LCD 显示屏驱动
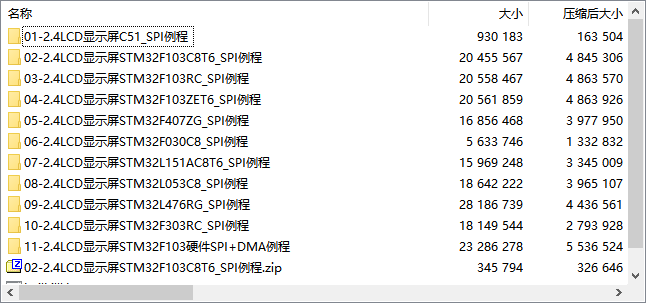
获取屏幕初始化序列
首先询问屏厂提供驱动源码
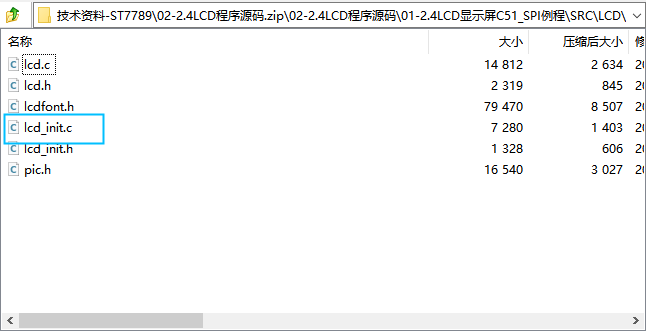
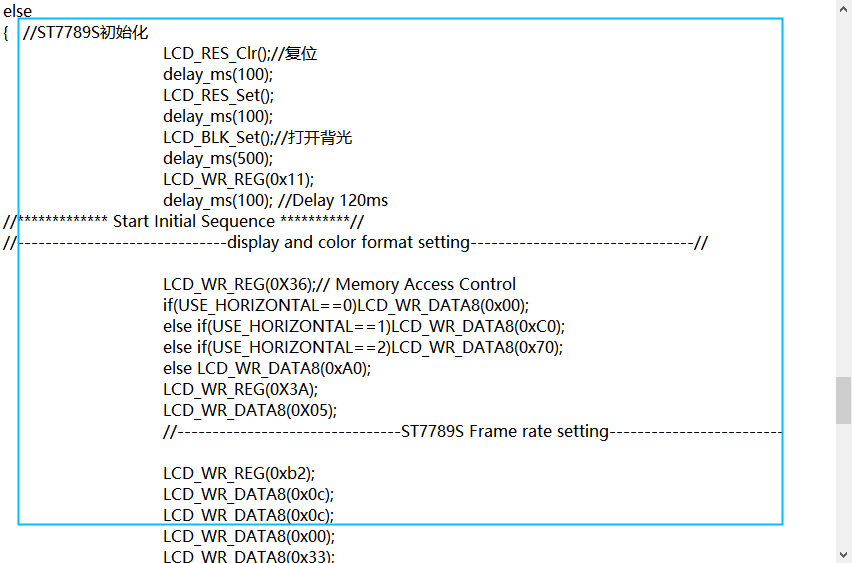
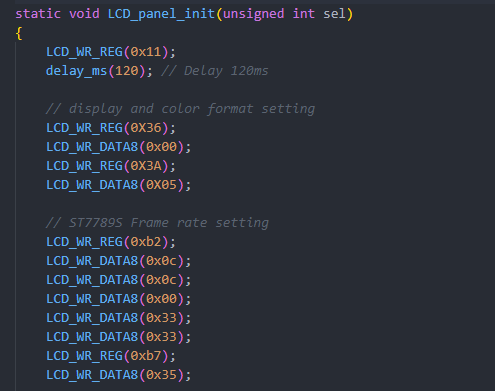
找到 LCD 的初始化序列代码
找到屏幕初始化的源码
整理后的初始化代码如下:
LCD_WR_REG(0x11);
delay_ms(120); // Delay 120ms

// display and color format setting
LCD_WR_REG(0X36);
LCD_WR_DATA8(0x00);
LCD_WR_REG(0X3A);
LCD_WR_DATA8(0X05);

// ST7789S Frame rate setting
LCD_WR_REG(0xb2);
LCD_WR_DATA8(0x0c);
LCD_WR_DATA8(0x0c);
LCD_WR_DATA8(0x00);
LCD_WR_DATA8(0x33);
LCD_WR_DATA8(0x33);
LCD_WR_REG(0xb7);
LCD_WR_DATA8(0x35);

// ST7789S Power setting
LCD_WR_REG(0xbb);
LCD_WR_DATA8(0x35);
LCD_WR_REG(0xc0);
LCD_WR_DATA8(0x2c);
LCD_WR_REG(0xc2);
LCD_WR_DATA8(0x01);
LCD_WR_REG(0xc3);
LCD_WR_DATA8(0x13);
LCD_WR_REG(0xc4);
LCD_WR_DATA8(0x20);
LCD_WR_REG(0xc6);
LCD_WR_DATA8(0x0f);
LCD_WR_REG(0xca);
LCD_WR_DATA8(0x0f);
LCD_WR_REG(0xc8);
LCD_WR_DATA8(0x08);
LCD_WR_REG(0x55);
LCD_WR_DATA8(0x90);
LCD_WR_REG(0xd0);
LCD_WR_DATA8(0xa4);
LCD_WR_DATA8(0xa1);

// ST7789S gamma setting
LCD_WR_REG(0xe0);
LCD_WR_DATA8(0xd0);
LCD_WR_DATA8(0x00);
LCD_WR_DATA8(0x06);
LCD_WR_DATA8(0x09);
LCD_WR_DATA8(0x0b);
LCD_WR_DATA8(0x2a);
LCD_WR_DATA8(0x3c);
LCD_WR_DATA8(0x55);
LCD_WR_DATA8(0x4b);
LCD_WR_DATA8(0x08);
LCD_WR_DATA8(0x16);
LCD_WR_DATA8(0x14);
LCD_WR_DATA8(0x19);
LCD_WR_DATA8(0x20);
LCD_WR_REG(0xe1);
LCD_WR_DATA8(0xd0);
LCD_WR_DATA8(0x00);
LCD_WR_DATA8(0x06);
LCD_WR_DATA8(0x09);
LCD_WR_DATA8(0x0b);
LCD_WR_DATA8(0x29);
LCD_WR_DATA8(0x36);
LCD_WR_DATA8(0x54);
LCD_WR_DATA8(0x4b);
LCD_WR_DATA8(0x0d);
LCD_WR_DATA8(0x16);
LCD_WR_DATA8(0x14);
LCD_WR_DATA8(0x21);
LCD_WR_DATA8(0x20);
LCD_WR_REG(0x29);
用现成驱动改写 SPI LCD 驱动
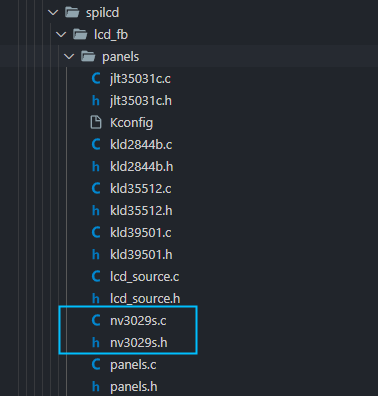
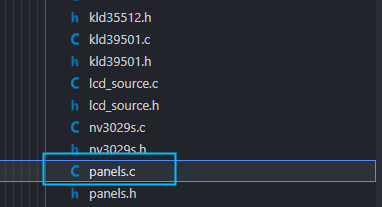
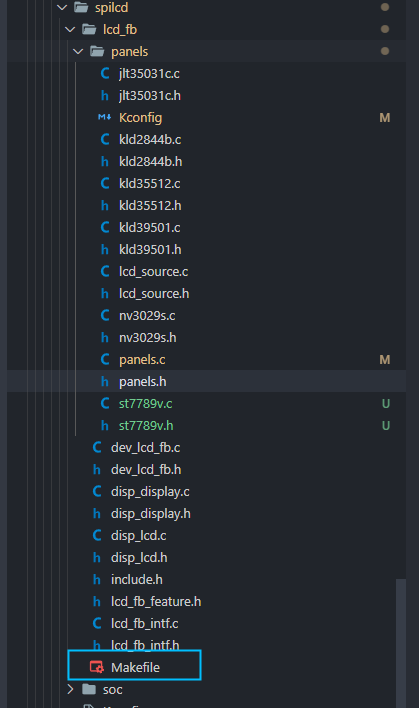
选择一个现成的 SPI LCD 改写即可,这里选择 nv3029s.c 驱动来修改
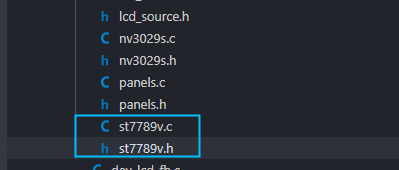
复制这两个驱动,重命名为 st7789v.c
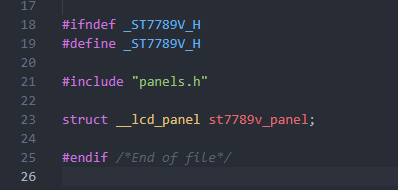
先编辑 st7789v.h 将 nv3029s 改成 st7789v
#ifndef _ST7789V_H
#define _ST7789V_H

#include "panels.h"

struct __lcd_panel st7789v_panel;

#endif /*End of file*/
编辑 st7789v.c 将 nv3029s 改成 st7789v
然后将屏厂提供的初始化序列复制进来
然后按照 spi_lcd 框架的接口改写驱动接口,具体接口如下
屏厂函数
SPILCD框架接口
LCD_WR_REG
sunxi_lcd_cmd_write
LCD_WR_DATA8
sunxi_lcd_para_write
delay_ms
sunxi_lcd_delay_ms
完成驱动如下
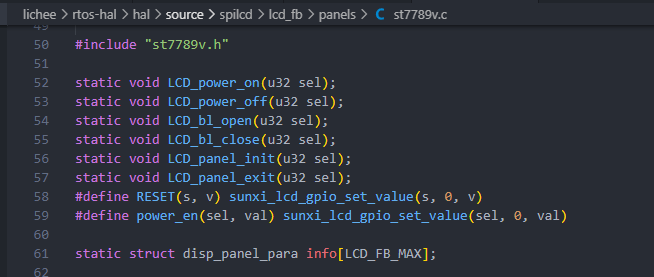
#include "st7789v.h"

static void LCD_power_on(u32 sel);
static void LCD_power_off(u32 sel);
static void LCD_bl_open(u32 sel);
static void LCD_bl_close(u32 sel);
static void LCD_panel_init(u32 sel);
static void LCD_panel_exit(u32 sel);
#define RESET(s, v) sunxi_lcd_gpio_set_value(s, 0, v)
#define power_en(sel, val) sunxi_lcd_gpio_set_value(sel, 0, val)

static struct disp_panel_para info[LCD_FB_MAX];

static void address(unsigned int sel, int x, int y, int width, int height)
{
    sunxi_lcd_cmd_write(sel, 0x2B); /* Set row address */
    sunxi_lcd_para_write(sel, (y > > 8) & 0xff);
    sunxi_lcd_para_write(sel, y & 0xff);
    sunxi_lcd_para_write(sel, (height > > 8) & 0xff);
    sunxi_lcd_para_write(sel, height & 0xff);
    sunxi_lcd_cmd_write(sel, 0x2A); /* Set coloum address */
    sunxi_lcd_para_write(sel, (x > > 8) & 0xff);
    sunxi_lcd_para_write(sel, x & 0xff);
    sunxi_lcd_para_write(sel, (width > > 8) & 0xff);
    sunxi_lcd_para_write(sel, width & 0xff);
    sunxi_lcd_cmd_write(sel, 0x2c);
}

static void LCD_panel_init(unsigned int sel)
{
    if (bsp_disp_get_panel_info(sel, &info[sel])) {
        lcd_fb_wrn("get panel info fail!n");
        return;
    }

    sunxi_lcd_cmd_write(sel, 0x11);
    sunxi_lcd_delay_ms(120);

    /* display and color format setting */
    sunxi_lcd_cmd_write(sel, 0X36);
    sunxi_lcd_para_write(sel, 0x00);
    sunxi_lcd_cmd_write(sel, 0X3A);
    sunxi_lcd_para_write(sel, 0X05);

    /* ST7789S Frame rate setting */
    sunxi_lcd_cmd_write(sel, 0xb2);
    sunxi_lcd_para_write(sel, 0x0c);
    sunxi_lcd_para_write(sel, 0x0c);
    sunxi_lcd_para_write(sel, 0x00);
    sunxi_lcd_para_write(sel, 0x33);
    sunxi_lcd_para_write(sel, 0x33);
    sunxi_lcd_cmd_write(sel, 0xb7);
    sunxi_lcd_para_write(sel, 0x35);

    /* ST7789S Power setting */
    sunxi_lcd_cmd_write(sel, 0xbb);
    sunxi_lcd_para_write(sel, 0x35);
    sunxi_lcd_cmd_write(sel, 0xc0);
    sunxi_lcd_para_write(sel, 0x2c);
    sunxi_lcd_cmd_write(sel, 0xc2);
    sunxi_lcd_para_write(sel, 0x01);
    sunxi_lcd_cmd_write(sel, 0xc3);
    sunxi_lcd_para_write(sel, 0x13);
    sunxi_lcd_cmd_write(sel, 0xc4);
    sunxi_lcd_para_write(sel, 0x20);
    sunxi_lcd_cmd_write(sel, 0xc6);
    sunxi_lcd_para_write(sel, 0x0f);
    sunxi_lcd_cmd_write(sel, 0xca);
    sunxi_lcd_para_write(sel, 0x0f);
    sunxi_lcd_cmd_write(sel, 0xc8);
    sunxi_lcd_para_write(sel, 0x08);
    sunxi_lcd_cmd_write(sel, 0x55);
    sunxi_lcd_para_write(sel, 0x90);
    sunxi_lcd_cmd_write(sel, 0xd0);
    sunxi_lcd_para_write(sel, 0xa4);
    sunxi_lcd_para_write(sel, 0xa1);

    /* ST7789S gamma setting */
    sunxi_lcd_cmd_write(sel, 0xe0);
    sunxi_lcd_para_write(sel, 0xd0);
    sunxi_lcd_para_write(sel, 0x00);
    sunxi_lcd_para_write(sel, 0x06);
    sunxi_lcd_para_write(sel, 0x09);
    sunxi_lcd_para_write(sel, 0x0b);
    sunxi_lcd_para_write(sel, 0x2a);
    sunxi_lcd_para_write(sel, 0x3c);
    sunxi_lcd_para_write(sel, 0x55);
    sunxi_lcd_para_write(sel, 0x4b);
    sunxi_lcd_para_write(sel, 0x08);
    sunxi_lcd_para_write(sel, 0x16);
    sunxi_lcd_para_write(sel, 0x14);
    sunxi_lcd_para_write(sel, 0x19);
    sunxi_lcd_para_write(sel, 0x20);
    sunxi_lcd_cmd_write(sel, 0xe1);
    sunxi_lcd_para_write(sel, 0xd0);
    sunxi_lcd_para_write(sel, 0x00);
    sunxi_lcd_para_write(sel, 0x06);
    sunxi_lcd_para_write(sel, 0x09);
    sunxi_lcd_para_write(sel, 0x0b);
    sunxi_lcd_para_write(sel, 0x29);
    sunxi_lcd_para_write(sel, 0x36);
    sunxi_lcd_para_write(sel, 0x54);
    sunxi_lcd_para_write(sel, 0x4b);
    sunxi_lcd_para_write(sel, 0x0d);
    sunxi_lcd_para_write(sel, 0x16);
    sunxi_lcd_para_write(sel, 0x14);
    sunxi_lcd_para_write(sel, 0x21);
    sunxi_lcd_para_write(sel, 0x20);
    sunxi_lcd_cmd_write(sel, 0x29);

    if (info[sel].lcd_x < info[sel].lcd_y)
        address(sel, 0, 0, info[sel].lcd_x - 1, info[sel].lcd_y - 1);
    else
        address(sel, 0, 0, info[sel].lcd_y - 1, info[sel].lcd_x - 1);
}

static void LCD_panel_exit(unsigned int sel)
{
    sunxi_lcd_cmd_write(sel, 0x28);
    sunxi_lcd_delay_ms(20);
    sunxi_lcd_cmd_write(sel, 0x10);
    sunxi_lcd_delay_ms(20);
    sunxi_lcd_pin_cfg(sel, 0);
}

static s32 LCD_open_flow(u32 sel)
{
    lcd_fb_here;
    /* open lcd power, and delay 50ms */
    LCD_OPEN_FUNC(sel, LCD_power_on, 50);
    /* open lcd power, than delay 200ms */
    LCD_OPEN_FUNC(sel, LCD_panel_init, 200);

    LCD_OPEN_FUNC(sel, lcd_fb_black_screen, 50);
    /* open lcd backlight, and delay 0ms */
    LCD_OPEN_FUNC(sel, LCD_bl_open, 0);

    return 0;
}

static s32 LCD_close_flow(u32 sel)
{
    lcd_fb_here;
    /* close lcd backlight, and delay 0ms */
    LCD_CLOSE_FUNC(sel, LCD_bl_close, 50);
    /* open lcd power, than delay 200ms */
    LCD_CLOSE_FUNC(sel, LCD_panel_exit, 10);
    /* close lcd power, and delay 500ms */
    LCD_CLOSE_FUNC(sel, LCD_power_off, 10);

    return 0;
}

static void LCD_power_on(u32 sel)
{
    /* config lcd_power pin to open lcd power0 */
    lcd_fb_here;
    power_en(sel, 1);

    sunxi_lcd_power_enable(sel, 0);

    sunxi_lcd_pin_cfg(sel, 1);
    RESET(sel, 1);
    sunxi_lcd_delay_ms(100);
    RESET(sel, 0);
    sunxi_lcd_delay_ms(100);
    RESET(sel, 1);
}

static void LCD_power_off(u32 sel)
{
    lcd_fb_here;
    /* config lcd_power pin to close lcd power0 */
    sunxi_lcd_power_disable(sel, 0);
    power_en(sel, 0);
}

static void LCD_bl_open(u32 sel)
{
    sunxi_lcd_pwm_enable(sel);
    /* config lcd_bl_en pin to open lcd backlight */
    sunxi_lcd_backlight_enable(sel);
    lcd_fb_here;
}

static void LCD_bl_close(u32 sel)
{
    /* config lcd_bl_en pin to close lcd backlight */
    sunxi_lcd_backlight_disable(sel);
    sunxi_lcd_pwm_disable(sel);
    lcd_fb_here;
}


/* sel: 0:lcd0; 1:lcd1 */
static s32 LCD_user_defined_func(u32 sel, u32 para1, u32 para2, u32 para3)
{
    lcd_fb_here;
    return 0;
}

static int lcd_set_var(unsigned int sel, struct fb_info *p_info)
{
    return 0;
}

static int lcd_set_addr_win(unsigned int sel, int x, int y, int width, int height)
{
    address(sel, x, y, width, height);
    return 0;
}

static int lcd_blank(unsigned int sel, unsigned int en)
{
    return 0;
}

struct __lcd_panel st7789v_panel = {
    /* panel driver name, must mach the name of lcd_drv_name in sys_config.fex
       */
    .name = "st7789v",
    .func = {
        .cfg_open_flow = LCD_open_flow,
        .cfg_close_flow = LCD_close_flow,
        .lcd_user_defined_func = LCD_user_defined_func,
        .blank = lcd_blank,
        .set_var = lcd_set_var,
        .set_addr_win = lcd_set_addr_win,
    },
};
对接驱动框架
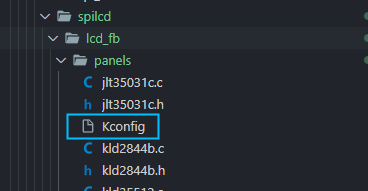
完成了屏幕驱动的编写,接下来需要对接到 SPILCD 驱动框架。首先编辑 Kconfig
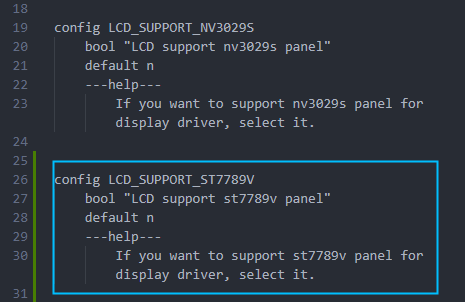
增加 st7789v 的配置
config LCD_SUPPORT_ST7789V
    bool "LCD support st7789v panel"
    default n
    ---help---
        If you want to support st7789v panel for display driver, select it.
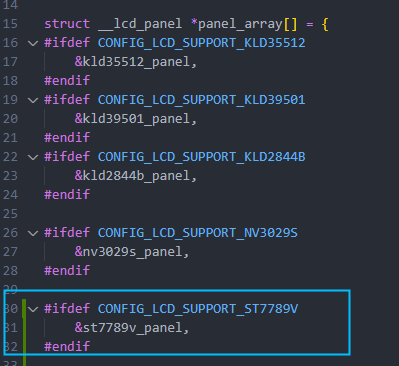
然后编辑 panels.c 在 panel_array 里增加 st7789 驱动的引用
如下图
#ifdef CONFIG_LCD_SUPPORT_ST7789V
    &st7789v_panel,
#endif
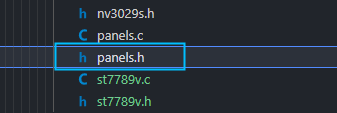
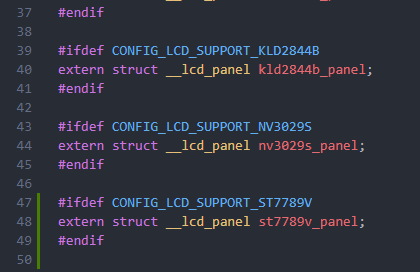
之后编辑 panels.h 同样增加引用
如下图
#ifdef CONFIG_LCD_SUPPORT_ST7789V
extern struct __lcd_panel st7789v_panel;
#endif
最后编辑外层的 Makefile 增加编译选项
如下所示
obj-${CONFIG_LCD_SUPPORT_ST7789V} += panels/st7789v.o
选择 ST7789V 驱动
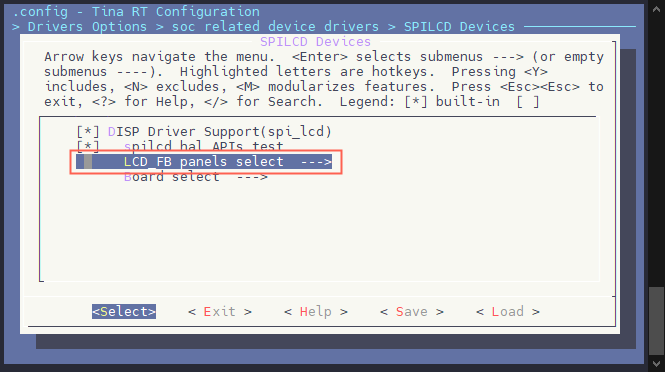
在 SPILCD 驱动选择界面可以看到 LCD_FB panels select 选择 SPI 屏幕的驱动
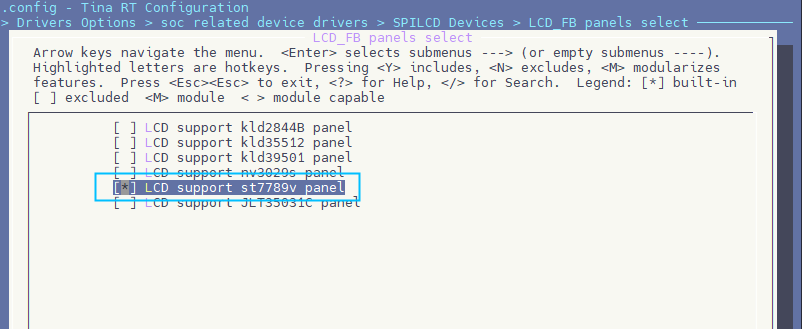
进入 LCD_FB panels select 选项
选择并勾选 [*] LCD support st7789v panel
配置 SPI LCD 引脚
打开你喜欢的编辑器,修改文件:board/r128s2/module/configs/sys_config.fex
[lcd_fb0]
lcd_used            = 1
lcd_model_name      = "spilcd"
lcd_driver_name     = "st7789v"
lcd_x               = 240
lcd_y               = 320
lcd_width           = 37
lcd_height          = 48
lcd_data_speed      = 50
lcd_pwm_used        = 1
lcd_pwm_ch          = 1
lcd_pwm_freq        = 5000
lcd_pwm_pol         = 0
lcd_if              = 0
lcd_pixel_fmt       = 11
lcd_dbi_fmt         = 2
lcd_dbi_clk_mode    = 1
lcd_dbi_te          = 1
fb_buffer_num       = 2
lcd_dbi_if          = 4
lcd_rgb_order       = 0
lcd_fps             = 60
lcd_spi_bus_num     = 1
lcd_frm             = 2
lcd_gamma_en        = 1
lcd_backlight       = 100

lcd_power_num       = 0
lcd_gpio_regu_num   = 0
lcd_bl_percent_num  = 0

lcd_spi_dc_pin      = port:PA19< 1 >< 0 >< 3 >< 0 >
;RESET Pin
lcd_gpio_0          = port:PA20< 1 >< 0 >< 2 >< 0 >
编译打包
运行命令 mp 编译打包,可以看到编译了 st7789v.o
测试
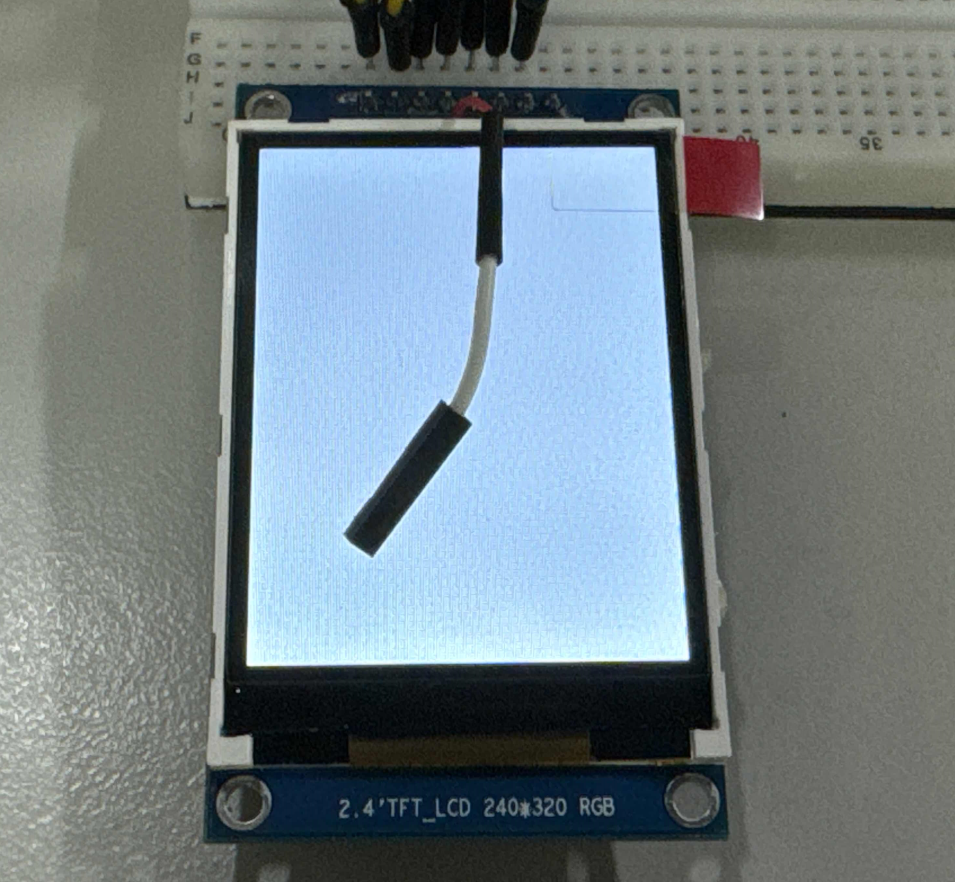
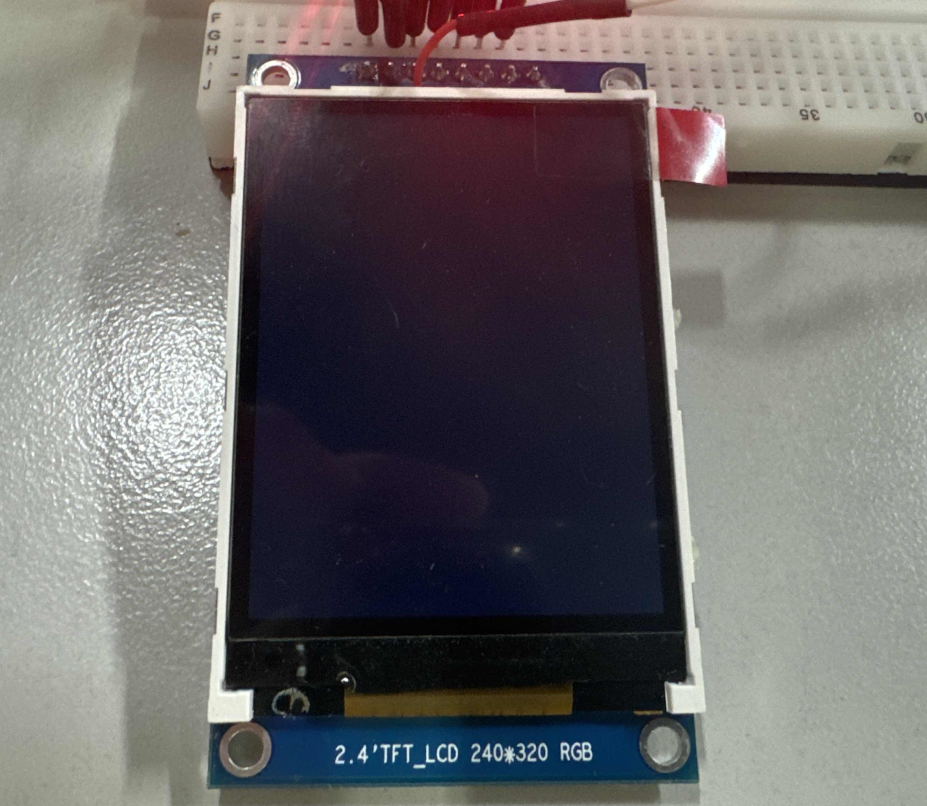
烧录启动之后,屏幕背光启动,但是屏幕全黑。
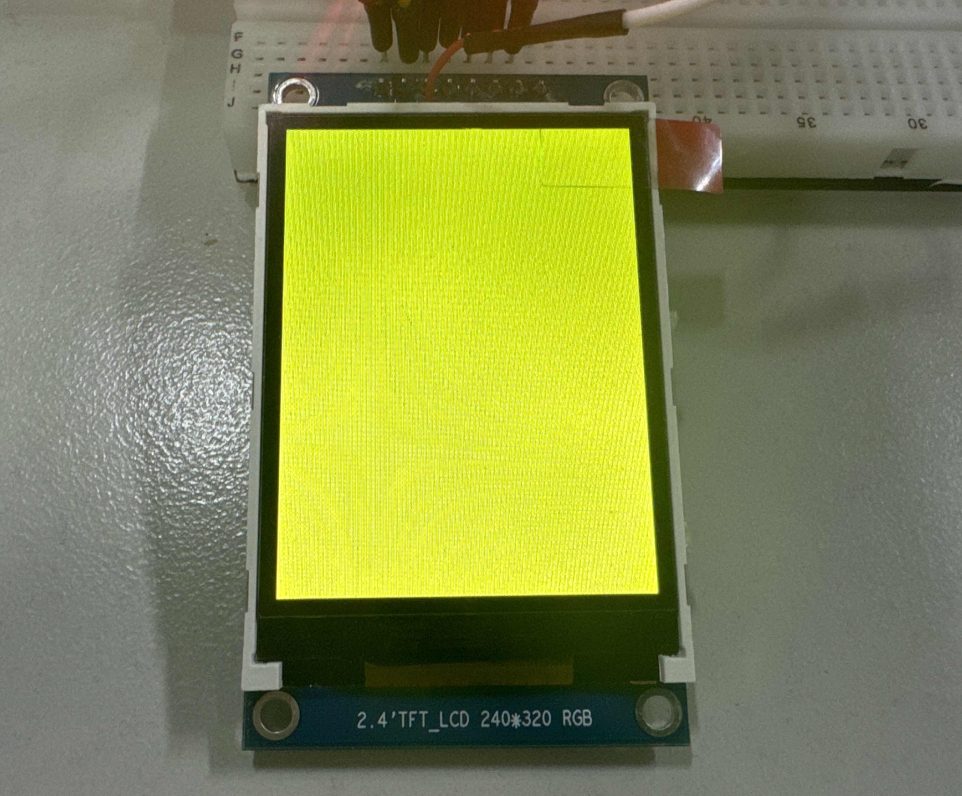
输入 test_spilcd ,屏幕显示黄色。
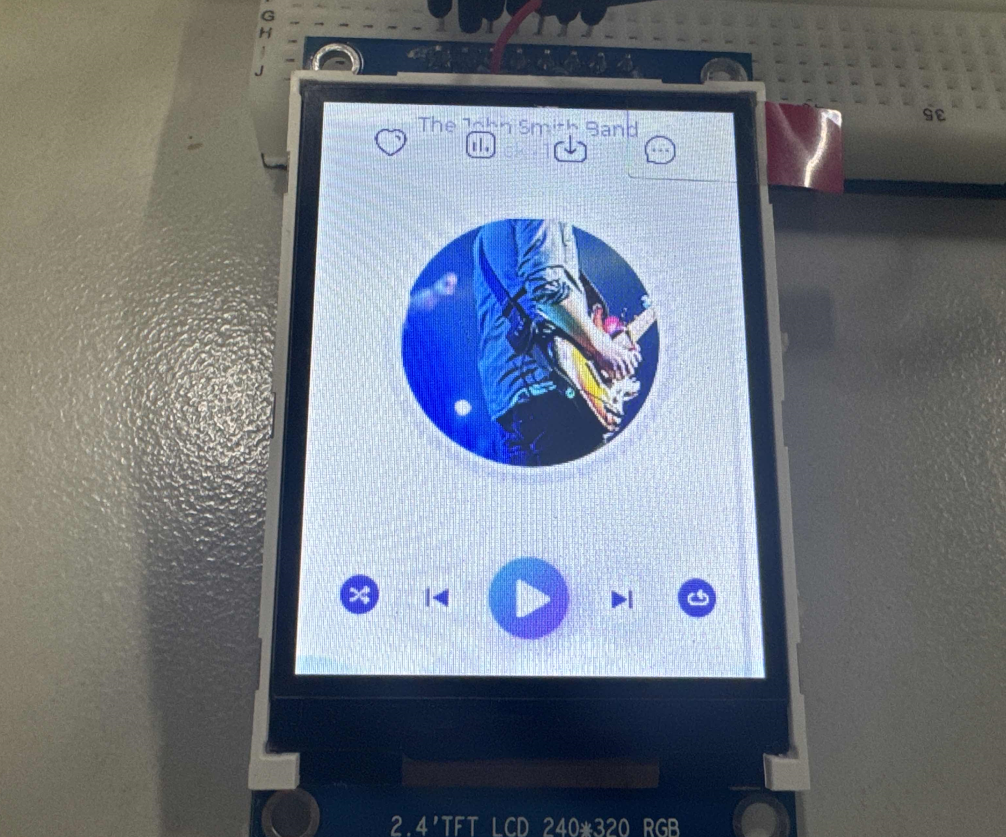
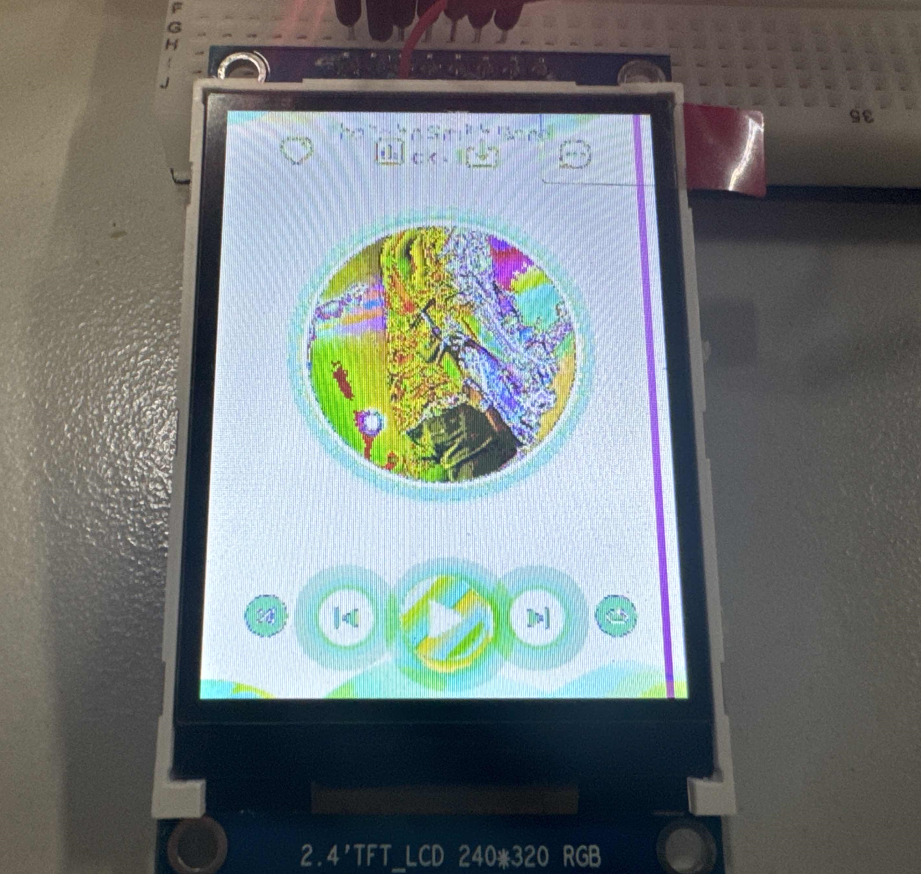
输入 lv_examples 1 可以显示 lvgl 界面
常见问题
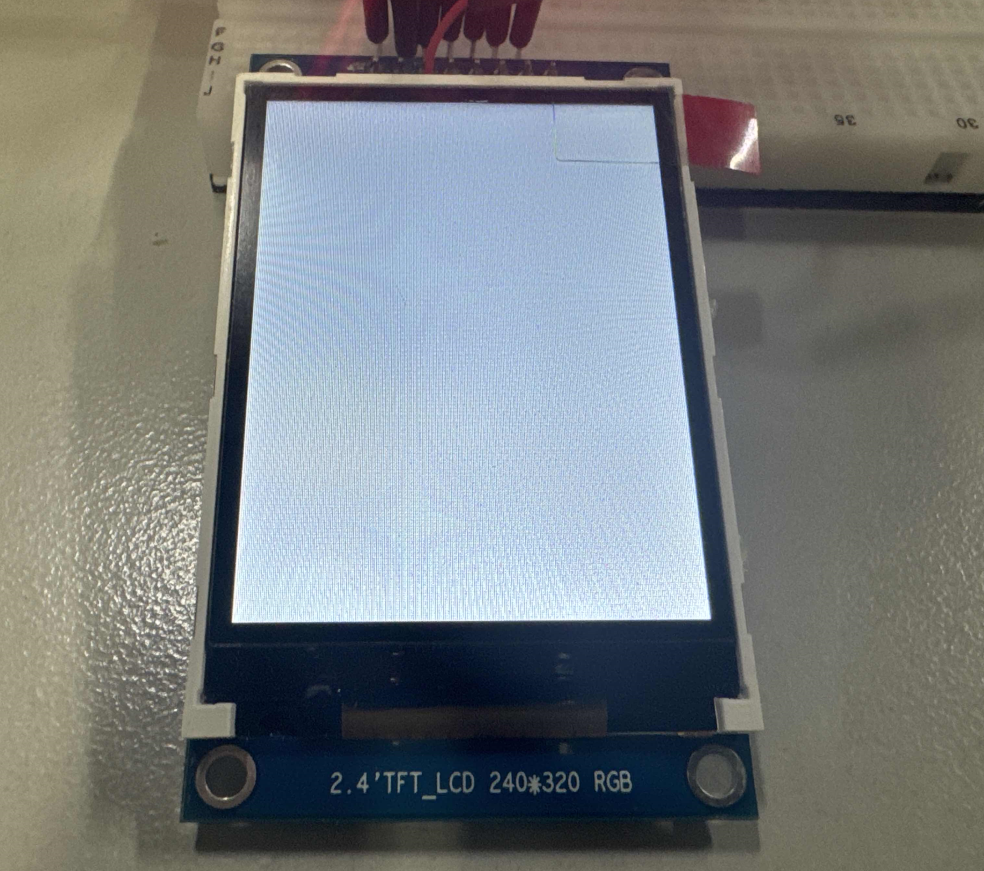
屏幕白屏
屏幕白屏,但是背光亮起
白屏是因为屏幕没有初始化,需要检查屏幕初始化序列或者初始化数据是否正确。
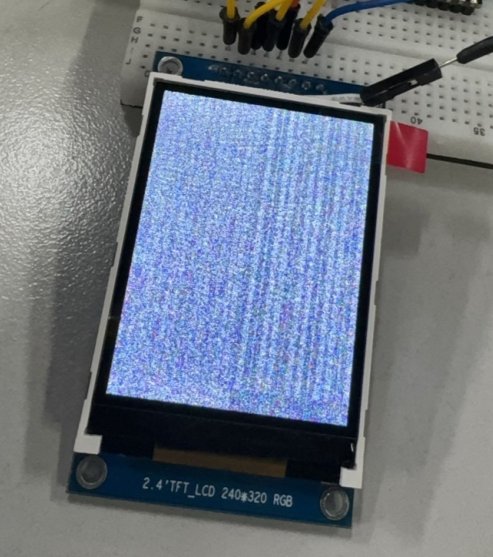
屏幕花屏
屏幕花屏,无法控制
花屏一般是因为屏幕初始化后没有正确设置 addrwin,或者初始化序列错误。
LVGL 屏幕颜色不正确
出现反色,颜色异常
请配置 LVGL LV_COLOR_DEPTH 参数为 16,LV_COLOR_16_SWAP 为 1,这是由 SPI LCD 的特性决定的。
显示反色
运行 test_spilcd ,屏幕显示蓝色。
这是由于屏幕启动了 RB SWAP,一般是 0x36 寄存器修改
正常显示
sunxi_lcd_cmd_write(sel, 0X36);
sunxi_lcd_para_write(sel, 0x00);
反色显示
sunxi_lcd_cmd_write(sel, 0X36);
sunxi_lcd_para_write(sel, 0x08);
-
SPI接口
+关注
关注
0文章
258浏览量
34359 -
LCD显示屏
+关注
关注
1文章
91浏览量
13290 -
TFT模块
+关注
关注
0文章
4浏览量
6471 -
ST7789V
+关注
关注
3文章
6浏览量
6759 -
PWM驱动
+关注
关注
0文章
28浏览量
1201 -
R128
+关注
关注
0文章
41浏览量
102
发布评论请先 登录
相关推荐
全志R128使用SPI驱动ST7789V1.47寸LCD
全志R128硬件设计指南①
全志R128 Devkit开发板原理图模块介绍及使用说明
全志R128适配 ST7789v LCD
全志R128应用开发案例——适配SPI驱动ST7789V2.4寸LCD
全志R128应用开发案例——SPI驱动ST7789V1.3寸LCD
全志R128应用开发案例——DBI驱动ST7789V1.3寸LCD屏
全志R128平台SPI与DBI点屏性能大对比
关于三线SPI驱动ST7789V


 全志R128适配ST7789v LCD








评论