 使用Eclipse插件调试AT32系列芯片
概述
本文档介绍通过使用Eclipse,ARM-GCC编译工具,GNU-ARM插件,Jlink,ATLink等资源来调试AT32系列芯片。本文档主要介绍:- Eclipse调试环境安装
- Eclipse template工程
- Eclipse编译配置
- Eclipse调试配置
AT32Fxx_Firmware_Libraryprojectat_start_xx emplateseclipse_gcc下的工程进行说明。
本文档所使用的软件都打包在AT32_Eclipse_Packet.zip,直接解压即可安装运行AT32_Eclipse_Packet.zip包含文件:
图1. AT32_Eclipse_Packet.zip包含文件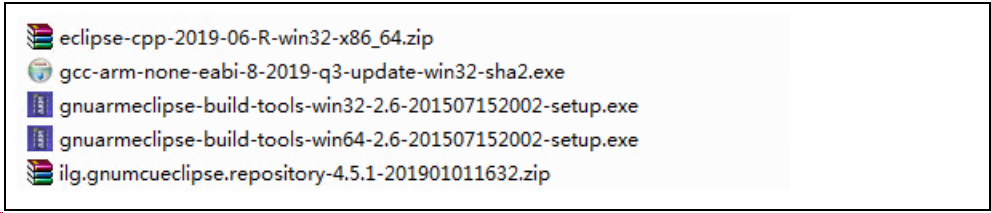
Eclipse调试环境安装
首先要明确需要安装哪些软件,如下是需要安装的软件:- Eclipse IDE for C/C++ Developers
- GNU ARM Eclipse插件
- GCC ARM编译器
- GNU ARM Eclipse Build Tools安装(make,rm等工具)
下面将详细介绍软件的安装部分。
Eclipse IDE for C/C++ Developers安装
Eclipse有多个版本,我们只需下载C/C++的版本,下载最新版本,AT32_Eclipse_Packet.zip 包含有一个可以使用的版本eclipse-cpp-2019-06-R-win32-x86_64.zip。下载地址:
http://www.eclipse.org/downloads/eclipse-packages/图2 Eclipse下载页面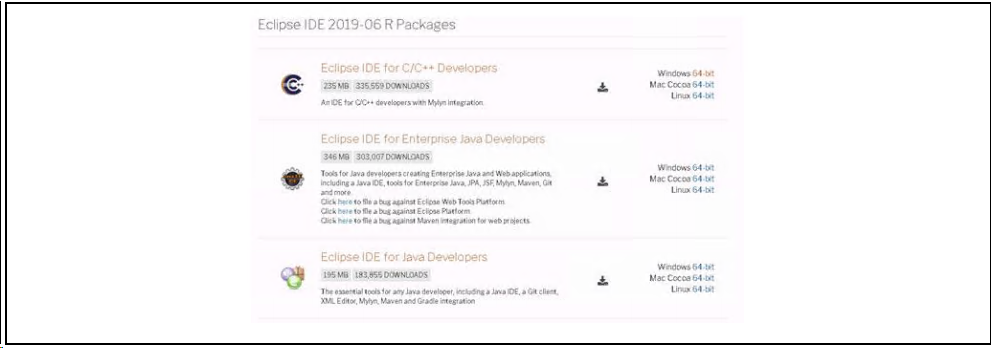
下载完成后直接解压eclipse-cpp-2019-06-R-win32-x86_64.zip,这里我们直接点击eclipse.exe就可以运行Eclipse,但此时还不能进行代码调试,需要进一步安装一下插件。
GNU ARM Eclipse插件安装
下载最新的GNU ARM Eclipse插件:ilg.gnumcueclipse.repository-4.5.1-201901011632.zip并解压。AT32_Eclipse_Packet.zip包含有一个可以使用的版本ilg.gnumcueclipse.repository-4.5.1-201901011632.zip。
网络下载地址:https://github.com/gnu-mcu-eclipse/eclipse-plugins/releases
开始安装:
1.打开Eclipse Help->Install New Software.图3. 进入Install New Software页面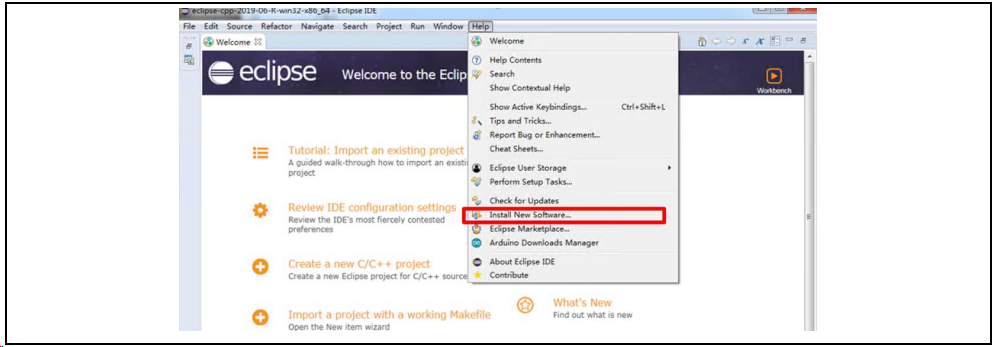
2.点击“Add...”
图4. 选择Add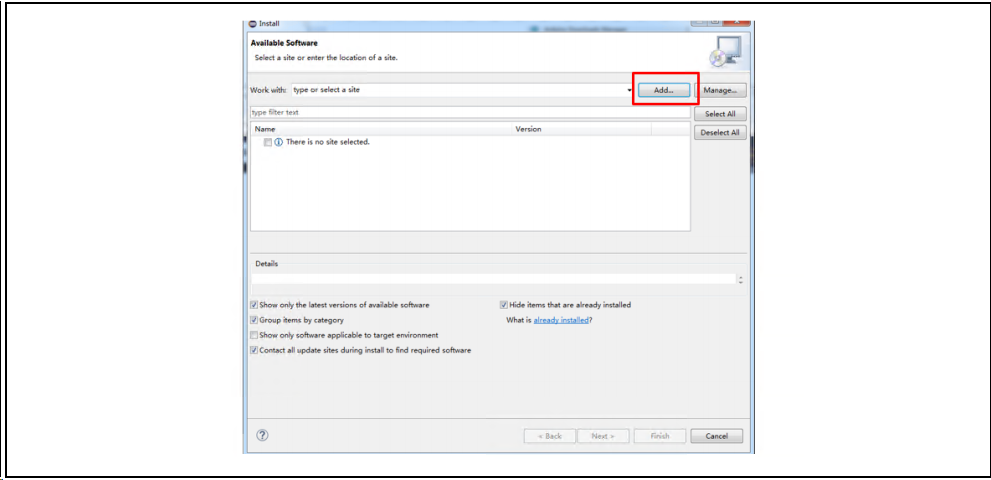
3.添加一个本地插件,也可以使用网络路径自动下载安装
图5. Add Respository
4.选择本地插件解压目录,点击”Add”
图6. 选择插件解压目录
5勾选所有的插件,“Next“
图7. 勾选插件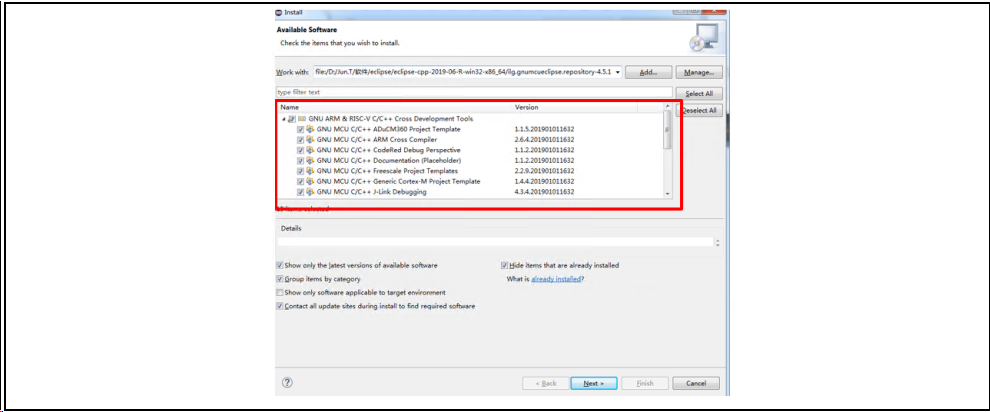
6.安装完成 “Next“
图8. 安装完成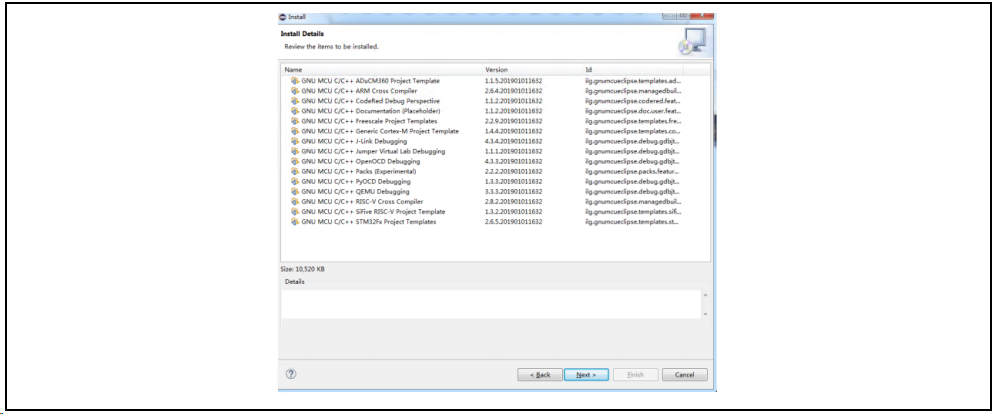 图9. accept the license agreement
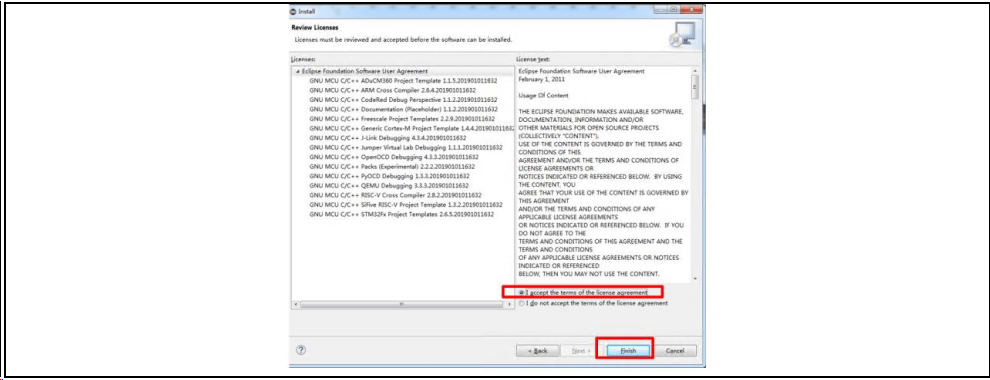
7.“Install anyway”
图10. Install anyway
8.重启Eclipse
图11. 重启Eclipse
ARM GCC编译工具链安装
下载最新的编译工具链gcc-arm-none-eabi-8-2019-q3-update-win32-sha2.exeAT32_Eclipse_Packet.zip包含有一个可以使用的版本gcc-arm-none-eabi-8-2019-q3-update-win32-sha2.exe。
下载地址:https://launchpad.net/gcc-arm-embedded/+download
开始安装:
1.选择语言图12. Install
2.安装向导,点击“下一步”
图13. 安装向导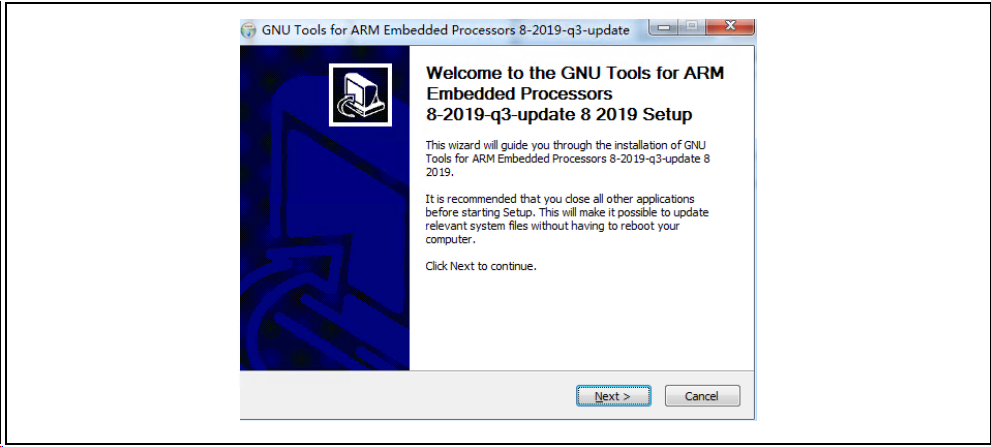
3.许可证协议,点击”我接受“
图14. 接受许可证协议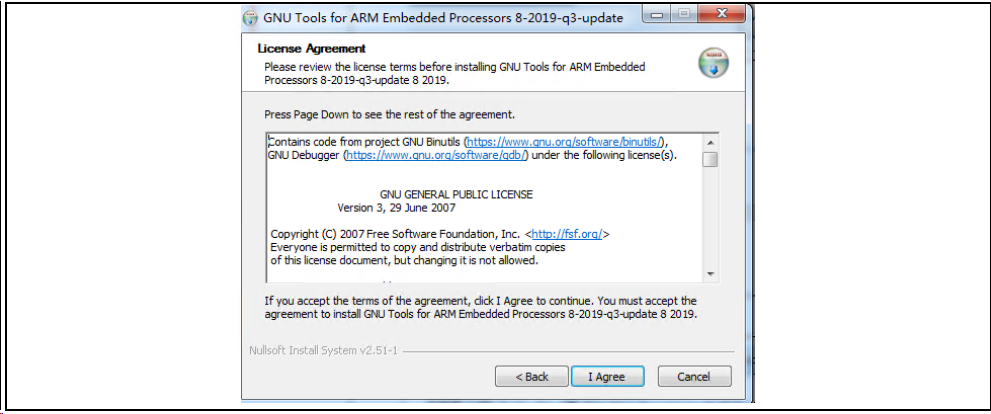
4.选择安装位置,安装到默认位置,点击“安装“,进入安装过程
图15. 安装过程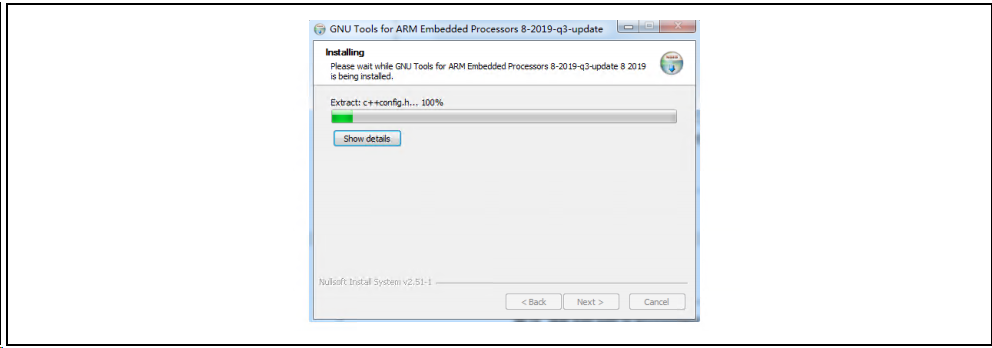
5.安装完成界面,要将”Add path to environment variable“选项勾上,会自动添加到环境变量之中,否则需要手动添加环境变量。
图16. 选择Add path to environment variable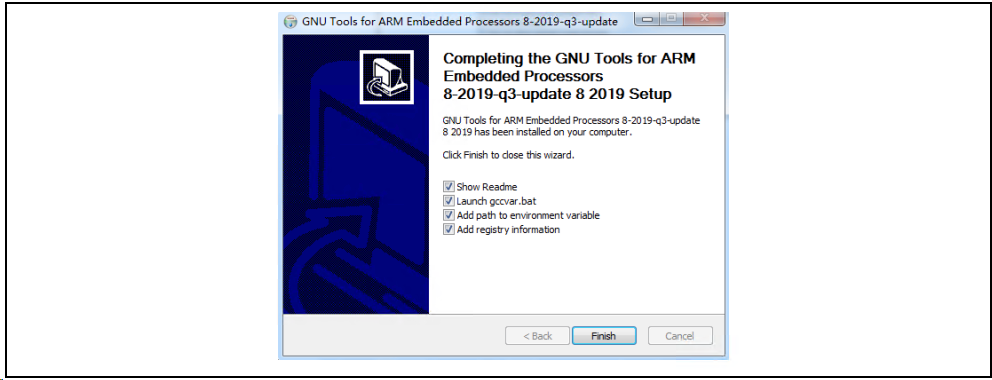
6.安装完成之后在弹出的命令窗口中输入 arm-none-eabi-gcc –v,会显示一些版本信息,表示安装成功。
图17. 安装结果查看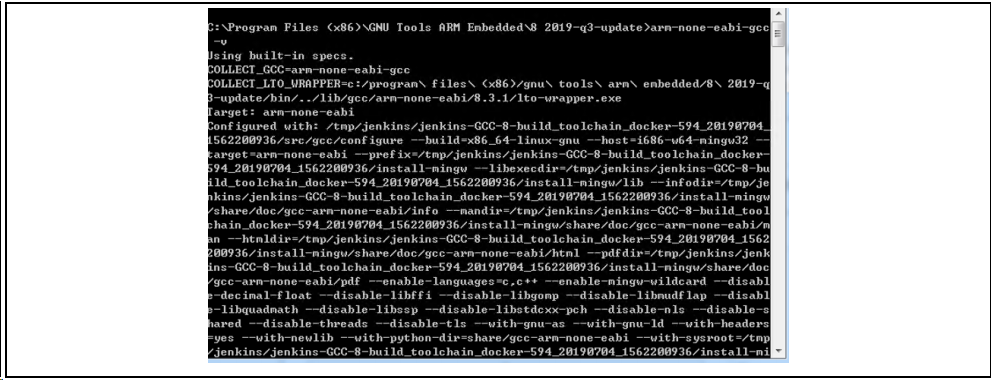
GNU ARM Eclipse Build Tools安装
此部分主要是安装make,rm等命令。下载地址:
https://sourceforge.net/projects/gnuarmeclipse/files/Build Tools/AT32_Eclipse_Packet.zip包含有一个可以使用的版本gnuarmeclipse-build-tools-win64-2.6-201507152002-setup.exe,或者下载其它适用版本。
1. 运行安装包
图18. 运行安装包
2. 选择安装路径
图19. 选择安装路径
3. 安装完成 需要重启Eclipse
图20. 安装完成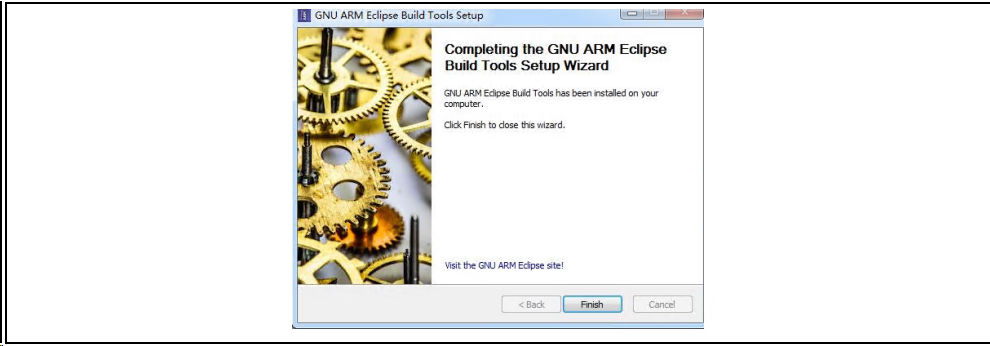
安装Jlink
需要将AT32系列芯片拷贝到Jlink目录,目前可使用ICP完成拷贝工作1. Jlink安装(略)
此部分按照下载最新的Jlink进行安装即可2. 算法文件拷贝
为了Jlink能够识别和下载程序到AT32芯片,可以将AT32芯片的下载算法拷贝到Jlink目录中,这里有个简单的方法是使用最新的ICP,直接运行ICP,ICP会将相应的AT32算法拷贝的Jlink目录。template工程配置与编译
本章介绍如何使用template工程,工程路径:AT32Fxx_Firmware_Libraryprojectat_start_xx emplateseclipse_gcc本章以AT32F437为例说明工程的配置与编译
打开template工程
1. 选择File→Open Projects from File System..
2.在Import source中选择路径,然后点击Finish。AT32F437xx template路径如下,其它系列路径类似
xxxAT32F435_437_Firmware_Libraryprojectat_start_f437 emplateseclipse_gcc emplate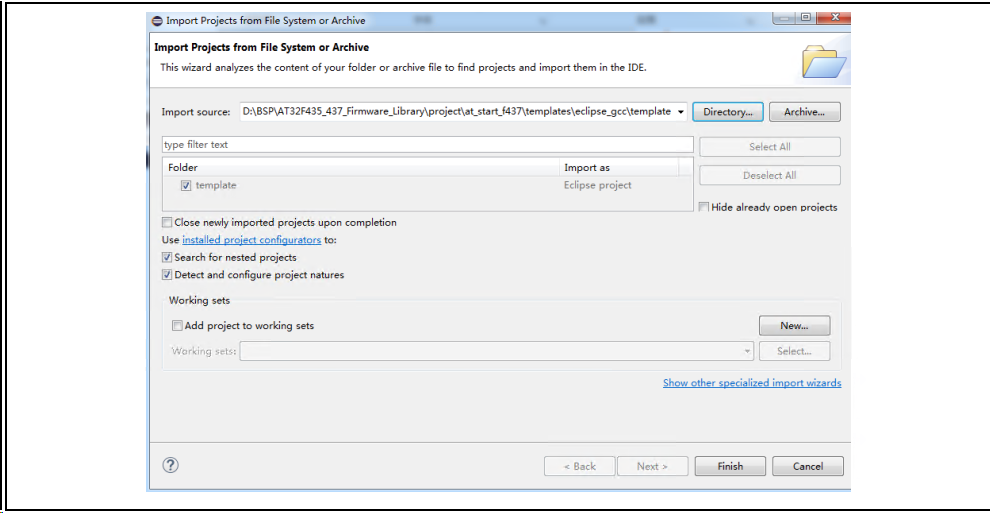
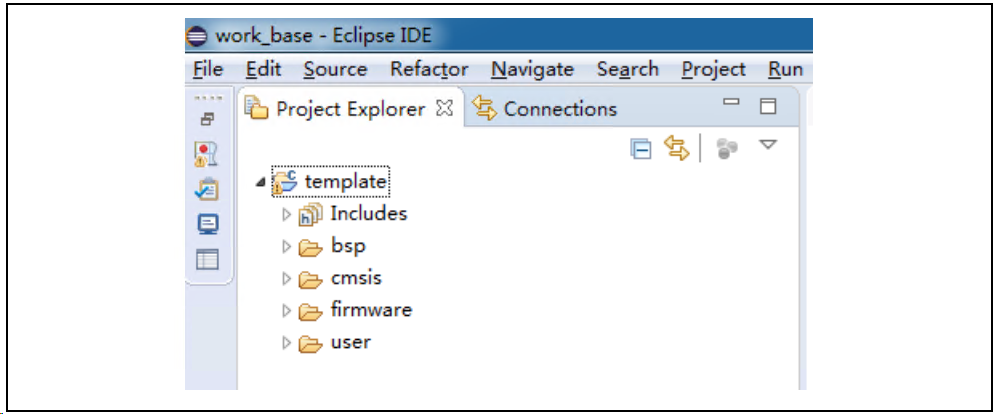
3.工程打开之后看到一个template的项目工程如下
编译
在编译过程中,需要对头文件的路径,以及一些芯片宏的定义,此部分在template工程有对应都有配置。配置包括如下内容
- 芯片配置
- 头文件路径配置
- 宏定义配置
- 链接脚本文件配置(不同型号之前ld文件会涉及到要修改)
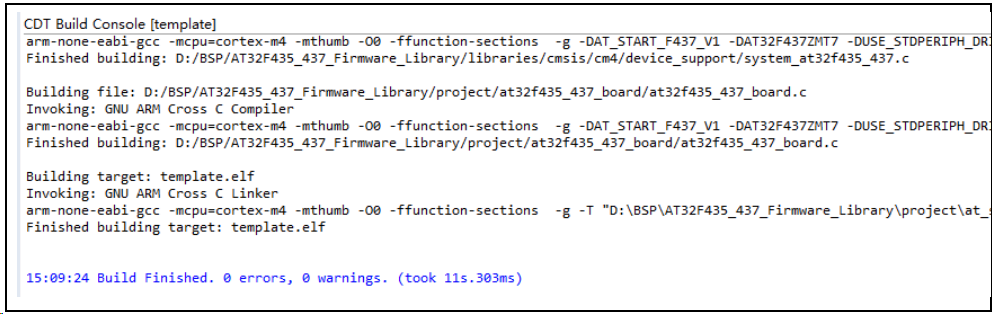
1.右键选择template工程,选择Build Project
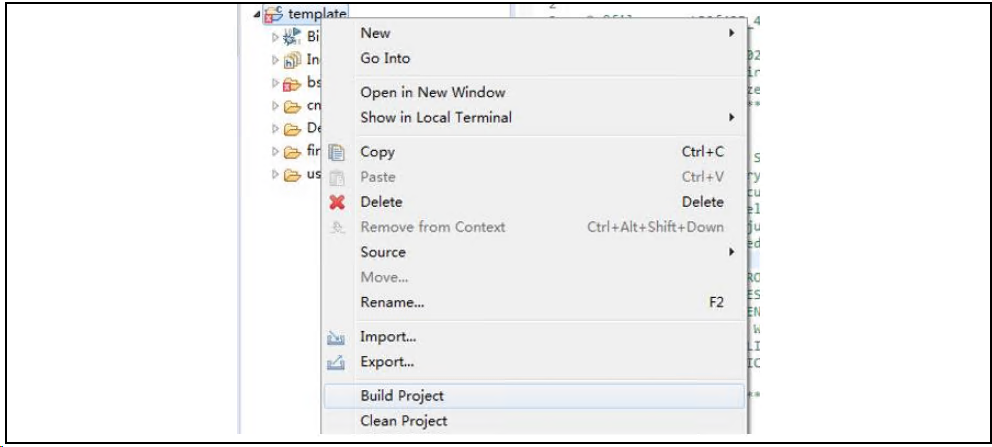
2.编译结束之后会生成template.elf
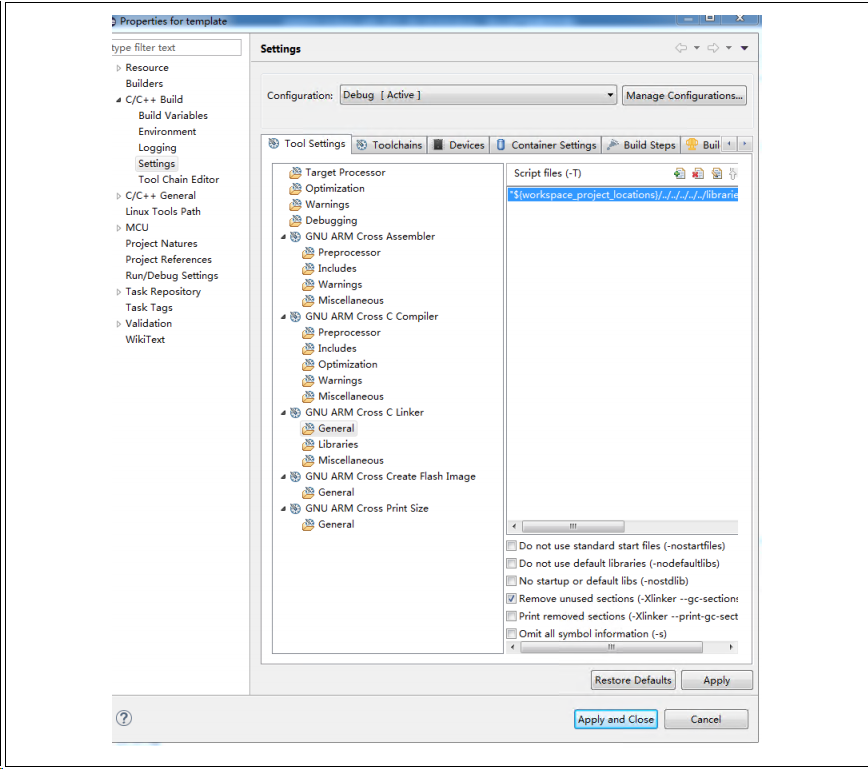
3.对于同一系列不同型号的配置,只需要修改ld文件即可,在下图的setting中修改。另外,其它如果要修改的如头文件路径等也是在下图setting中对应选项中修改即可。
 左右滑动查看更多
调试
本章分别描述用jlink和atlink调试at32系列芯片。Jlink调试
本部分主要说明调试的一些配置:
- Jlink配置
- GDB配置
- SVD外设寄存器配置
Debug配置
1. “Run”→”Debug Configurations”→”GDB SEGGER J-Link Debugging”→“New Configuration”建立一个新的Debug配置,配置JlinkGDBServerCL,Device name根据需要调试的具体芯片型号填写,例如AT32F437ZMT7,AT32F413RCT7,AT32F415RCT7等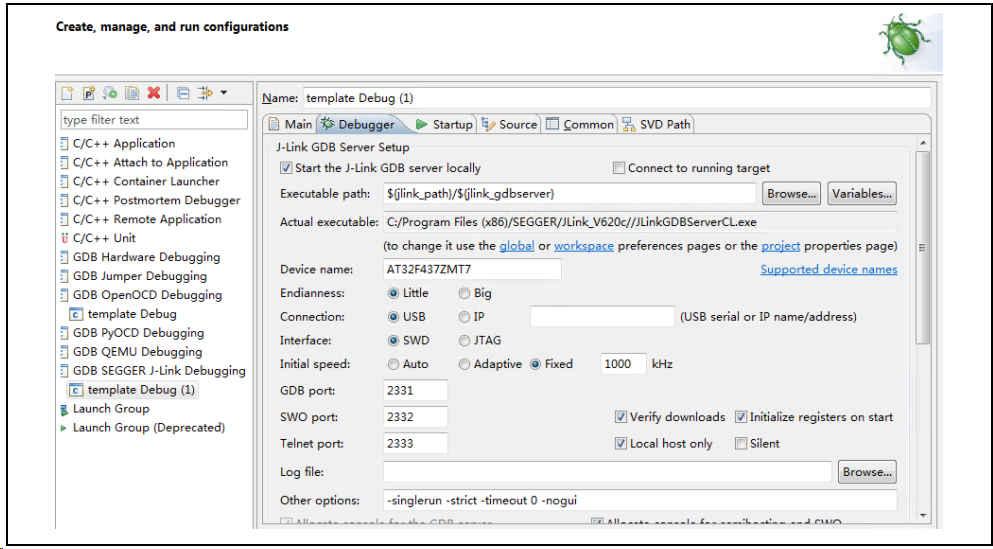
2. 配置GDB,选择GCC安装目录下的arm-none-eabi-gdb.exe
3. SVD Path选择,用于Debug寄存器的描述,这里可以直接使用keil下的svd文件,当安装了AT32的keil Packet之后,会自动将svd拷贝到keil目录下。

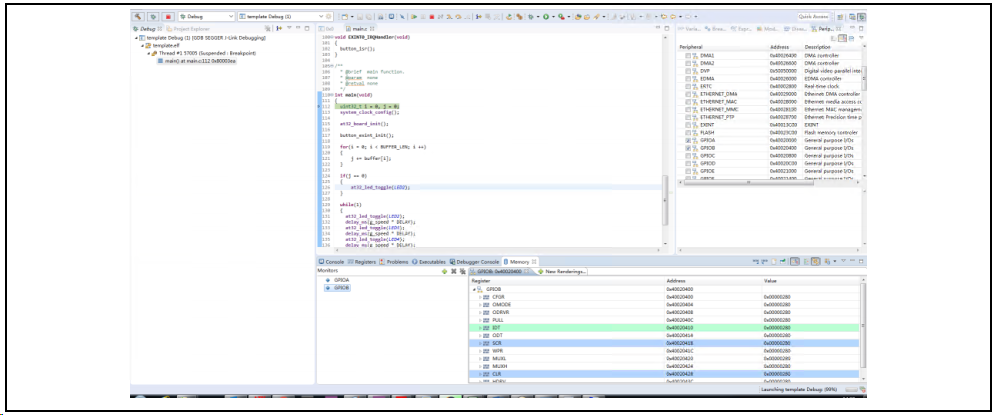
4.Debug配置完成→“Apply”→”Debug”进入调试
AT-Link调试
本部分主要说明使用OpenOCD+Eclipse+ATLink来调试AT32。关于ATLink的使用说明请参考《AT-Link_User_Manual_SC.pdf》本节主要说明如下内容:- Eclipse Openocd配置
- GDB配置
- SVD 外设寄存器配置
包含5个目录,bin文件下为可执行exe,scripts目录为配置文件目录
OpenOCD包含如下目录文件:

Debug 配置
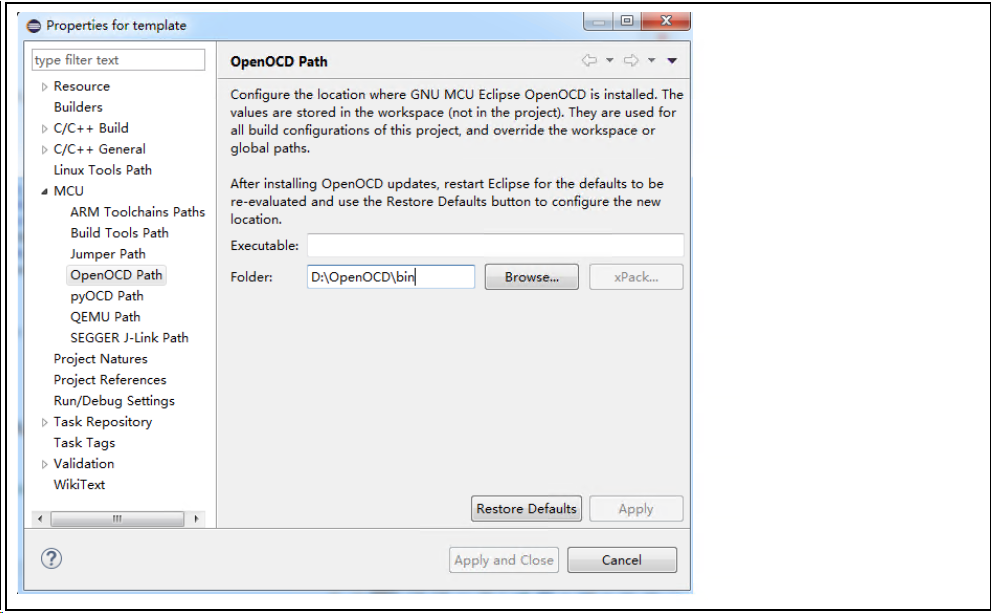
1. 配置OpenOCD路径,Project→Properties→MCU→OpenOCD Path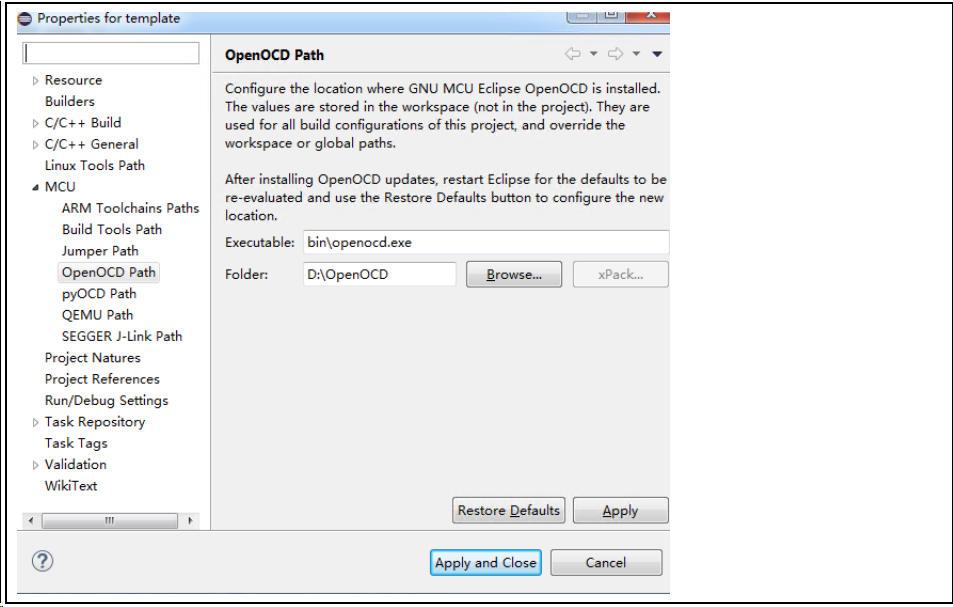
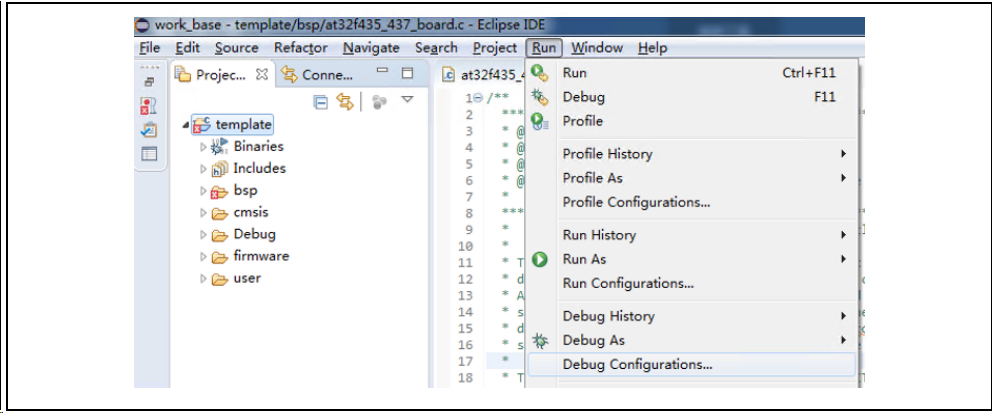
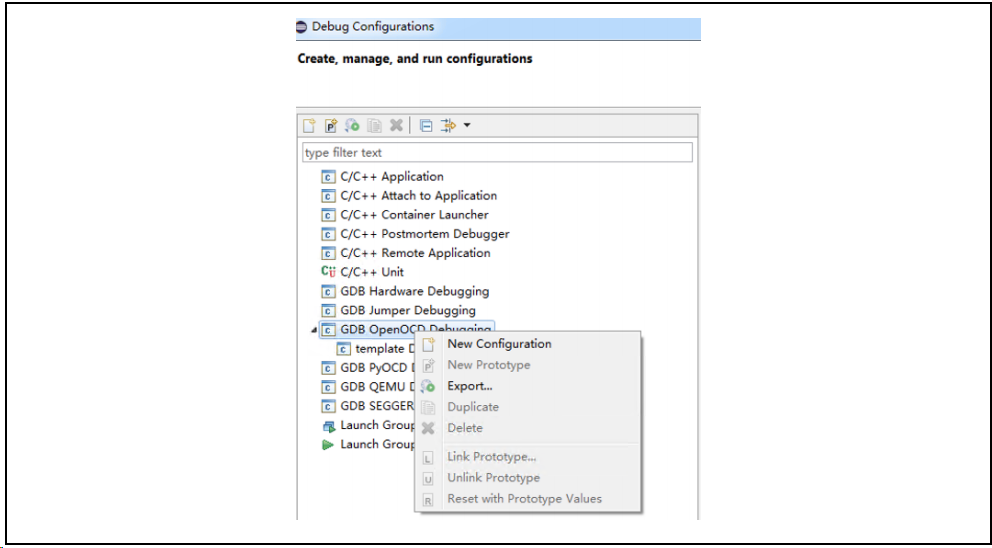
2. “Run”→”Debug Configurations”→”GDB OpenOCD Debugging”→“New Configuration”建立一个新的Debug配置
可配置项如下:
openocd的可执行文件路径:D:OpenOCDinopenocd.exeConfig options:-s ${openocd_path}scripts -f ./interface/atlink.cfg -f ./target/at32f437xM.cfgatlink.cfg表示使用atlink调试工具,at32f437xM.cfg表示at32f437 FLASH有4032KB的型号,其它AT32F437的型号可统一使用at32f437xx.cfg。对于不同的系列,如AT32F403A,AT32F415等此处对应的target/xxx.cfg需要做对应的修改。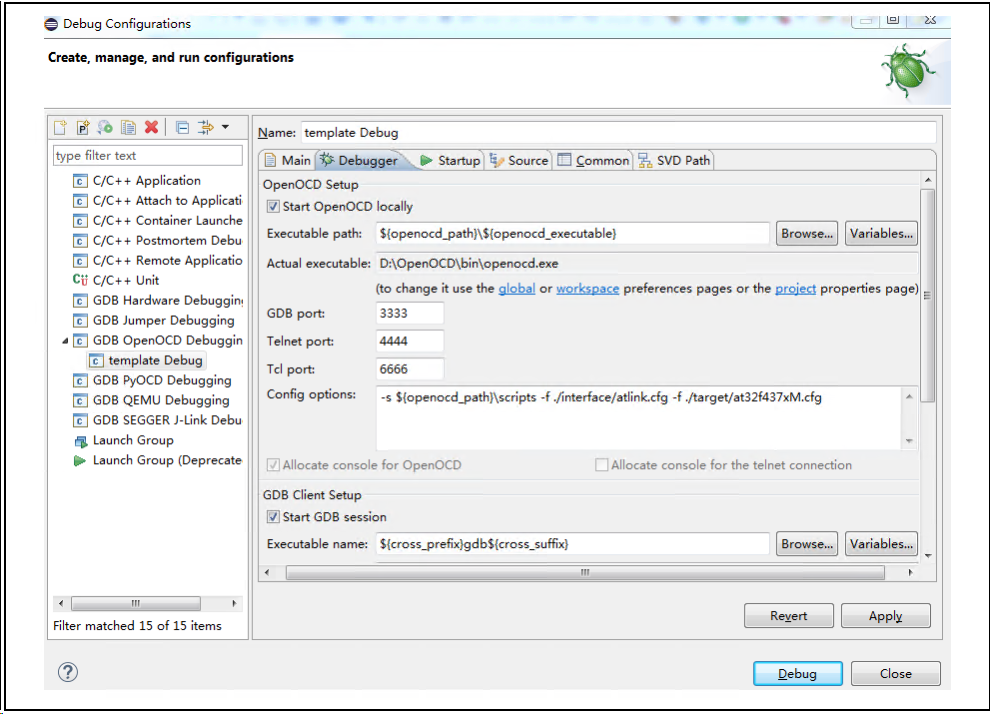
3. 配置SVD文件
可下载对应型号的SVD文件用于Debug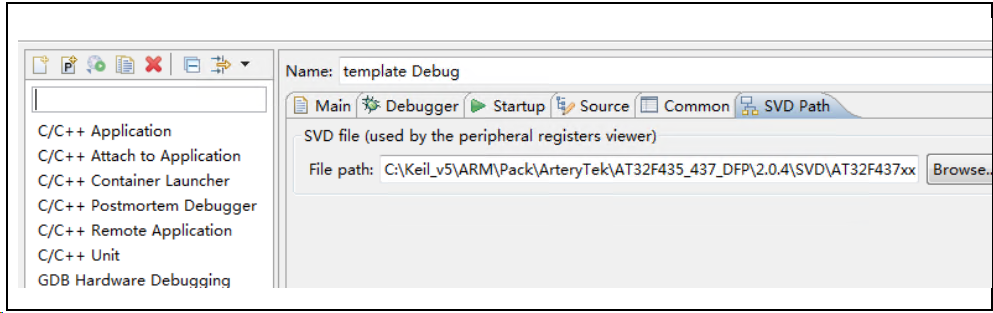
4. Debug配置完成→“Apply”→”Debug”进入调试

审核编辑:汤梓红
-
芯片
+关注
关注
455文章
50732浏览量
423237 -
调试
+关注
关注
7文章
578浏览量
33924 -
Eclipse
+关注
关注
1文章
114浏览量
21438
原文标题:AT32讲堂013 | 如何使用Eclipse插件调试AT32 MCU
文章出处:【微信号:AT32 MCU 雅特力科技,微信公众号:AT32 MCU 雅特力科技】欢迎添加关注!文章转载请注明出处。
发布评论请先 登录
相关推荐
【图文经验】第一帖:用Eclipse开发stm32(GNU ARM Eclipse Plug-in)(编码+编译+下载+调试)
Eclipse IDE插件研发工程师
如何安装Eclipse插件
请问eclipse+ac6插件如何调试stm32?
SPC5 Studio是否支持Eclipse的iSYSTEM winIDEA插件
怎样用现成的Eclipse插件来调试AT32系列芯片以及SLIB的配置范例
怎样用现成的Eclipse插件来调试AT32系列芯片
如何使用Eclipse调试Python


用于实时开发的Eclipse插件
AT32讲堂008 | AT32 MCU如何用Eclipse插件调试sLib

AT32讲堂013 | 如何使用Eclipse插件调试AT32 MCU


 工商网监
工商网监
评论