本来今天想下载编译openWRT,后来发现tf卡空间分配问题,明天再调整吧,看了看桌上的USB摄像头,今天晚上就你出场了。
一开始我是犹豫的,因为RISC-V的生态,不一定能部署的上相关软件,但是JH7110,加上Imagination的GPU,再加上Debian OS,想不出会有什么不兼容的场景,最大风险可能来自CPU,有的话应该都能解决掉,那就上吧。
一、软件环境
(一)操作系统
官方的Debian镜像(starfive-jh7110-202306-SD-minimal-desktop.img),也没用去update了,反正也挺新的。
root@starfive:# uname -a
Linux starfive 5.15.0-starfive #1 SMP Sun Jun 11 07:48:39 UTC 2023 riscv64 GNU/Linux
就是因为文件名上带minimal,可能需要安装的东西会比较多,反正我心里有个数。
(二)安装libjpeg62-turbo-dev
root@starfive:# apt install libjpeg62-turbo-dev
Reading package lists... Done
Building dependency tree... Done
Reading state information... Done
The following additional packages will be installed:
  libc-dev-bin libc-devtools libc6-dev libcrypt-dev libnsl-dev libtirpc-dev
  linux-libc-dev manpages manpages-dev rpcsvc-proto
Suggested packages:
  glibc-doc
The following NEW packages will be installed:
  libc-dev-bin libc-devtools libc6-dev libcrypt-dev libjpeg62-turbo-dev
  libnsl-dev libtirpc-dev linux-libc-dev manpages manpages-dev rpcsvc-proto
0 upgraded, 11 newly installed, 0 to remove and 0 not upgraded.
Need to get 8933 kB of archives.
After this operation, 44.8 MB of additional disk space will be used.
Do you want to continue? [Y/n] y
(三)安装imagemagick
root@starfive:#  apt install imagemagick
Reading package lists... Done
Building dependency tree... Done
Reading state information... Done
The following additional packages will be installed:
  imagemagick-6.q16 libnetpbm11 netpbm
Suggested packages:
  imagemagick-doc autotrace cups-bsd | lpr | lprng curl enscript ffmpeg gimp
  gnuplot grads graphviz hp2xx html2ps libwmf-bin mplayer povray radiance
  texlive-base-bin transfig ufraw-batch xdg-utils
  imagemagick imagemagick-6.q16 libnetpbm11 netpbm
0 upgraded, 4 newly installed, 0 to remove and 0 not upgraded.
After this operation, 7693 kB of additional disk space will be used.
(四)安装libv4l-dev
root@starfive:# apt install libv4l-dev
Reading package lists... Done
Building dependency tree... Done
Reading state information... Done
The following additional packages will be installed:
  libv4l2rds0
Suggested packages:
  pkg-config
The following NEW packages will be installed:
  libv4l-dev libv4l2rds0
0 upgraded, 2 newly installed, 0 to remove and 0 not upgraded.
Need to get 291 kB of archives.
After this operation, 1948 kB of additional disk space will be used.
Do you want to continue? [Y/n] y
Get:1 https://snapshot.debian.org/archive/debian-ports/20221225T084846Z unstable/main riscv64 libv4l2rds0 riscv64 1.22.1-5+b1 [80.4 kB]
Get:2 https://snapshot.debian.org/archive/debian-ports/20221225T084846Z unstable/main riscv64 libv4l-dev riscv64 1.22.1-5+b1 [211 kB]
Fetched 291 kB in 5s (61.7 kB/s)
(五)安装编译工具
发现gcc、git、cmake啥都没用,果然够minimal,逐一apt install。
root@starfive: # apt install gcc
Reading package lists... Done
Building dependency tree... Done
Reading state information... Done
The following additional packages will be installed:
  gcc-12 libasan8 libcc1-0 libgcc-12-dev
Suggested packages:
  gcc-multilib make autoconf automake libtool flex bison gdb gcc-doc
  gcc-12-doc gcc-12-locales
The following NEW packages will be installed:
  gcc gcc-12 libasan8 libcc1-0 libgcc-12-dev
0 upgraded, 5 newly installed, 0 to remove and 0 not upgraded.
Need to get 18.6 MB of archives.
After this operation, 70.0 MB of additional disk space will be used.
Do you want to continue? [Y/n] y
Get:1 https://snapshot.debian.org/archive/debian-ports/20221225T084846Z unstable/main riscv64 libcc1-0 riscv64 12.2.0-10 [38.4 kB]
Get:2 https://snapshot.debian.org/archive/debian-ports/20221225T084846Z unstable/main riscv64 libasan8 riscv64 12.2.0-10 [2067 kB]
Get:3 https://snapshot.debian.org/archive/debian-ports/20221225T084846Z unstable/main riscv64 libgcc-12-dev riscv64 12.2.0-10 [1951 kB]
Get:4 https://snapshot.debian.org/archive/debian-ports/20221225T084846Z unstable/main riscv64 gcc-12 riscv64 12.2.0-10 [14.6 MB]
Get:5 https://snapshot.debian.org/archive/debian-ports/20221225T084846Z unstable/main riscv64 gcc riscv64 4:12.2.0-1 [5200 B]
Fetched 18.6 MB in 3min 55s (79.5 kB/s)
安装完成后检查下:
root@starfive:# gcc -v
Using built-in specs.
COLLECT_GCC=gcc
COLLECT_LTO_WRAPPER=/usr/lib/gcc/riscv64-linux-gnu/12/lto-wrapper
Target: riscv64-linux-gnu
Configured with: ../src/configure -v --with-pkgversion='Debian 12.2.0-10' --with-bugurl=file:///usr/share/doc/gcc-12/README.Bugs --enable-languages=c,ada,c++,go,d,fortran,objc,obj-c++,m2 --prefix=/usr --with-gcc-major-version-only --program-suffix=-12 --program-prefix=riscv64-linux-gnu- --enable-shared --enable-linker-build-id --libexecdir=/usr/lib --without-included-gettext --enable-threads=posix --libdir=/usr/lib --enable-nls --enable-clocale=gnu --enable-libstdcxx-debug --enable-libstdcxx-time=yes --with-default-libstdcxx-abi=new --enable-gnu-unique-object --disable-libitm --disable-libquadmath --disable-libquadmath-support --enable-plugin --enable-default-pie --with-system-zlib --enable-libphobos-checking=release --with-target-system-zlib=auto --enable-objc-gc=auto --enable-multiarch --disable-werror --disable-multilib --with-arch=rv64gc --with-abi=lp64d --enable-checking=release --build=riscv64-linux-gnu --host=riscv64-linux-gnu --target=riscv64-linux-gnu
Thread model: posix
Supported LTO compression algorithms: zlib zstd
gcc version 12.2.0 (Debian 12.2.0-10)
二、源码下载、编译和安装
(一)源码下载
JH7110处理能力毋庸置疑,直接板子上编译和安装,源代码直接从github上拉取。
git clone https://github.com/jacksonliam/mjpg-streamer.git
Cloning into 'mjpg-streamer'...
remote: Enumerating objects: 2964, done.
remote: Total 2964 (delta 0), reused 0 (delta 0), pack-reused 2964
Receiving objects: 100% (2964/2964), 3.48 MiB | 4.33 MiB/s, done.
Resolving deltas: 100% (1885/1885), done.
(二)源码编译和安装
进入/mjpg-streamer/mjpg-streamer-experimental 文件夹,执行 make all。
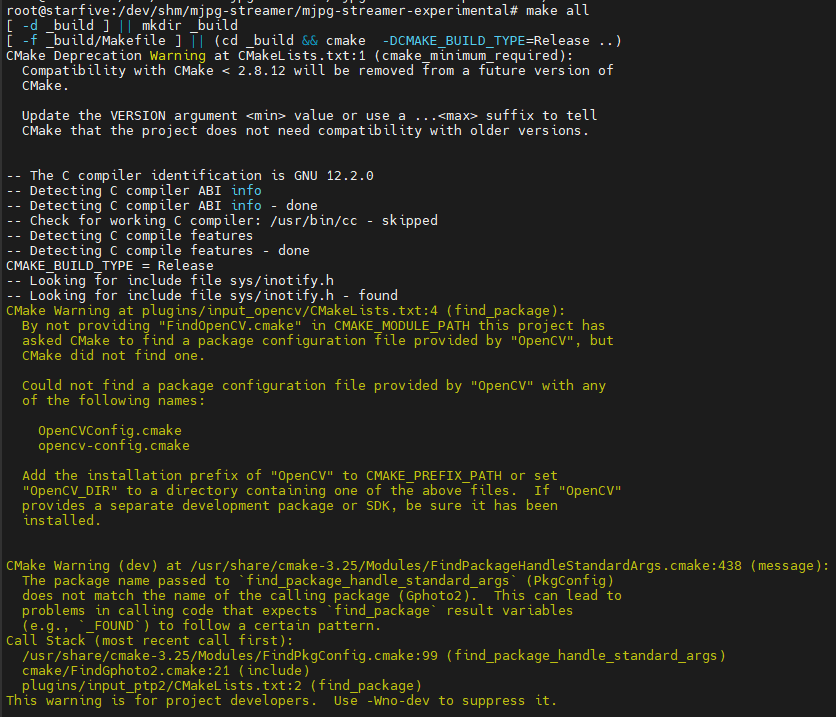
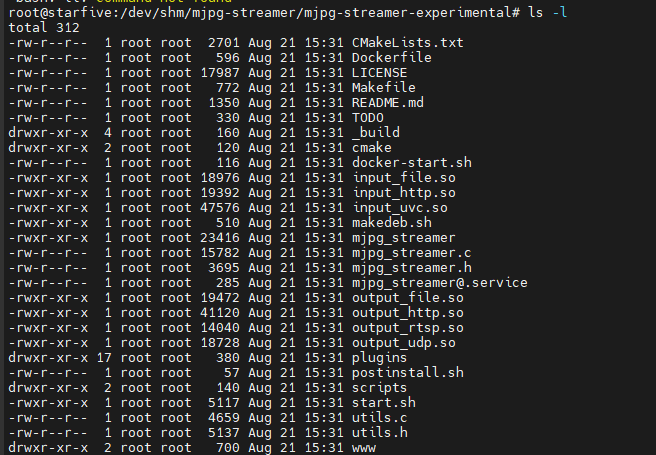
检查下生成的文件,
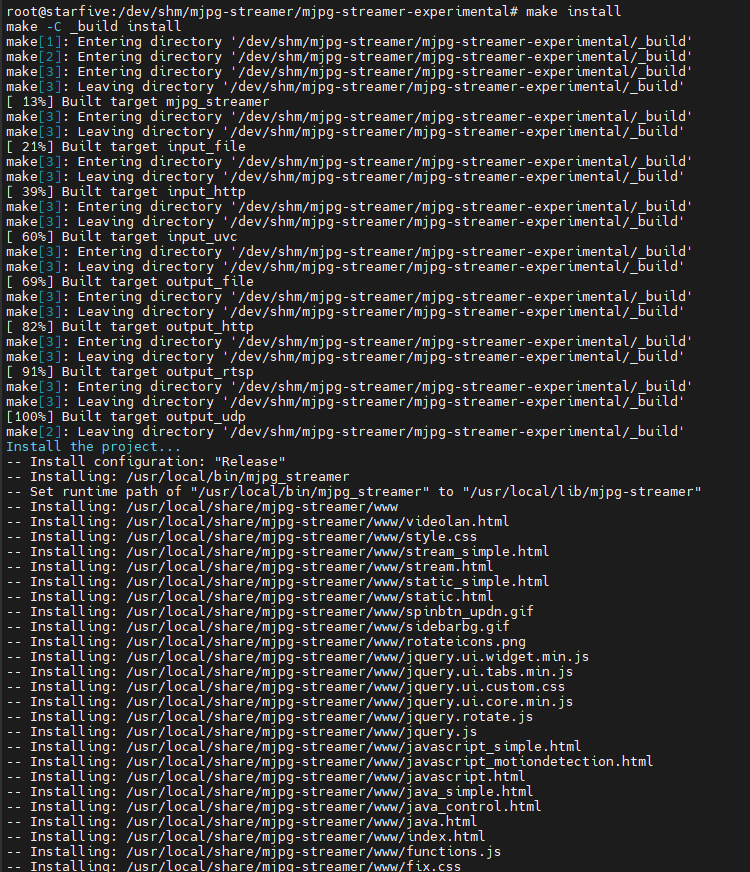
再安装。
三、服务启动
(一)前期工作
首先确保网络正常连接。

之后插入USB camera,OS提示已经识别:
root@starfive: # [ 3976.150090] usb 1-1.3: new high-speed USB device number 3 using xhci_hcd
[ 3976.295340] usb 1-1.3: Found UVC 1.00 device HIK 720P Camera (2bdf:0280)
[ 3976.306997] input: HIK 720P Camera: HIK 720P Camer as /devices/platform/soc/2b000000.pcie/pci0000:00/0000:00:00.0/0000:01:00.0/usb1/1-1/1-1                                                                     .3/1-1.3:1.0/input/input0
通过对比video大法判断设备名,找出是/dev/video4:
root@starfive: # ls -l /dev/video*
crw-rw----+ 1 root video 81, 0 Dec 22  2022 /dev/video0
crw-rw----+ 1 root video 81, 1 Dec 22  2022 /dev/video1
crw-rw----+ 1 root video 81, 2 Dec 22  2022 /dev/video2
crw-rw----+ 1 root video 81, 3 Dec 22  2022 /dev/video3
crw-rw----+ 1 root video 81, 6 Aug 21 14:42 /dev/video4
crw-rw----+ 1 root video 81, 7 Aug 21 14:42 /dev/video5
crw-rw----+ 1 root video 81, 4 Dec 22  2022 /dev/video6
crw-rw----+ 1 root video 81, 5 Dec 22  2022 /dev/video7
(二)启动USB摄像头
直接输入 mjpg_streamer 即可启动服务,默认的是video0,VF2开发板的USB摄像头是video4。在启动服务命令中通过“-d /dev/video4” 选项来指定。
y是表示YUV格式。如果没有-y,默认启动是mjpeg格式
-d指定设备
-f 制订帧数,默认30帧
-r指定视频大小,如320×240
-q指定画质,默认80对于输出参数:
-p 指定端口,一般是8080
-w 指定网页目录,设置的是/www目录
-c设置通过密码访问
./mjpg_streamer -i "./input_uvc.so -d /dev/video4 -f 30 -q 90 -n" -o "./output_http.so -w ./www"
启动后的日志如下:

四、网络摄像头测试
(一)在线视频查看
打开浏览器,访问URL为:[VF2开发板 IP]:8080 ,得到的内容如下:
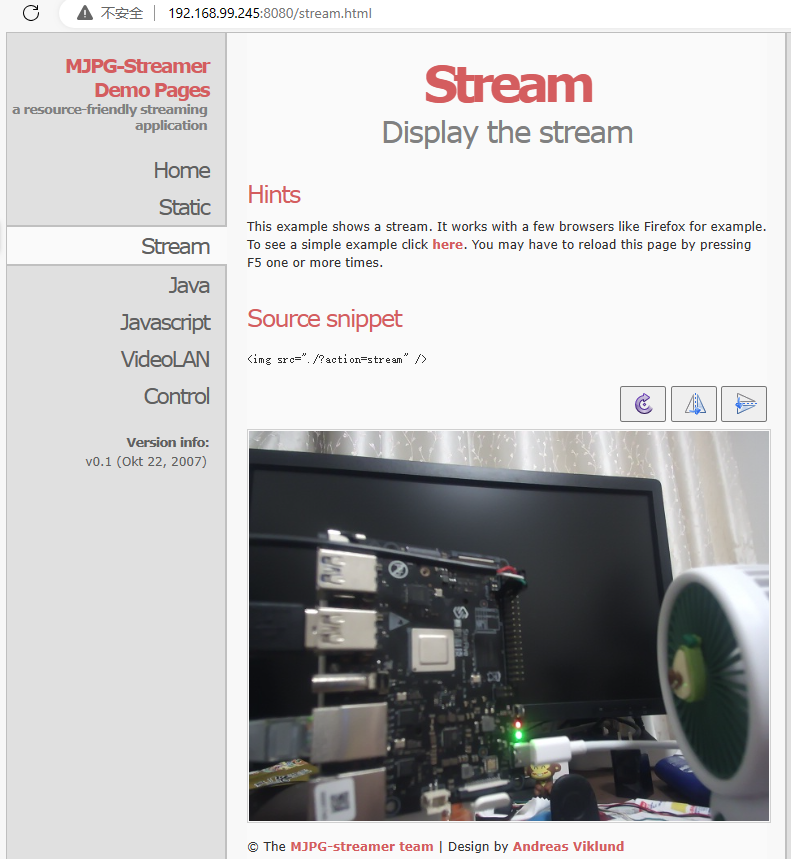
(二)取一张图
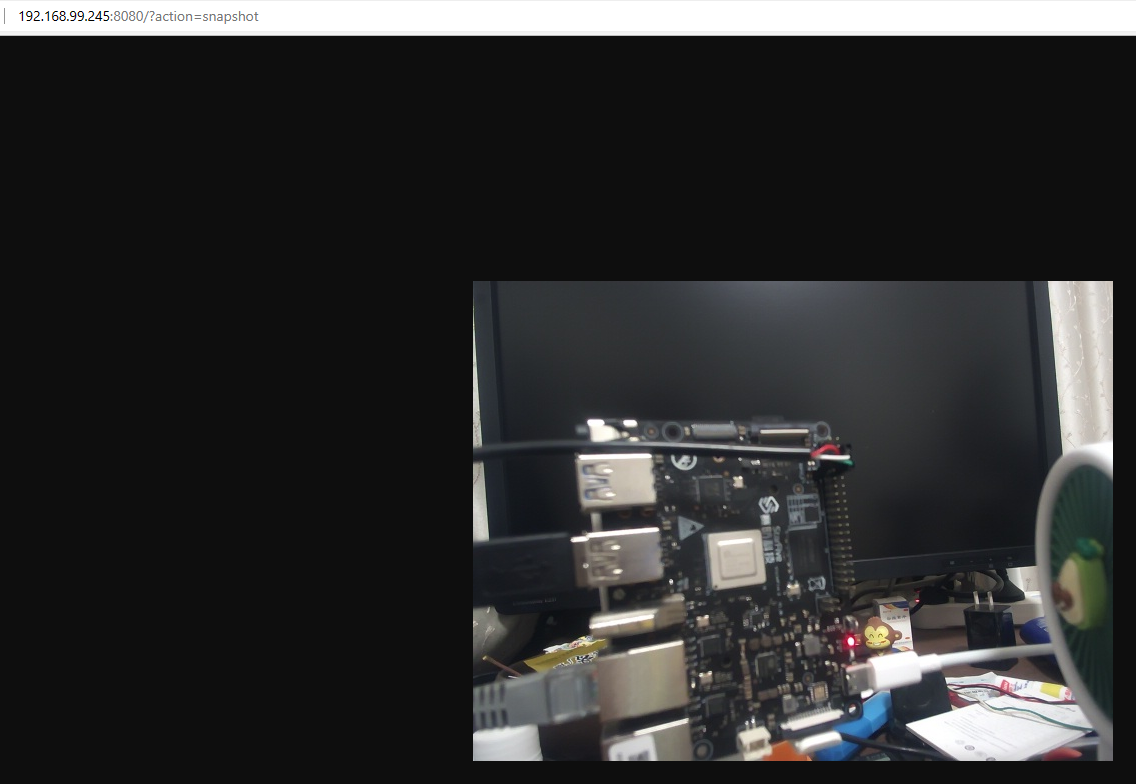
取一张图的URL为`IP:8080?action=snapshot,直接给自己照相:
五、一些体会
全程下来无错误,整个软件安装非常顺利,本以为会出现的各种小问题一个都没。
JH7110 CPU功能强大,之前在H616上也编译过mjpg-streamer,耗时跟VF2完全不同,在VF2上简直飞一般编译安装。
GPU(Imagination BXE-4-32 GPU)还没有测试,按理来说Imagination的应该兼容性和性能不会有什么大问题,下次有时间可以测试下。
 /6
/6 